在 Windows XP 上安装 USB 虚拟网路卡驱动程式
本文将介绍在 Windows XP 上面安装 USB 虚拟网路卡驱动程式的方法,以便透过 USB Device 介面与 L86duntu 进行网路连线。
步骤 1
下载 86Duino 专用的 USB 虚拟网路卡驱动程式,将其解压缩在您的 Windows XP 个人电脑里。
步骤 2
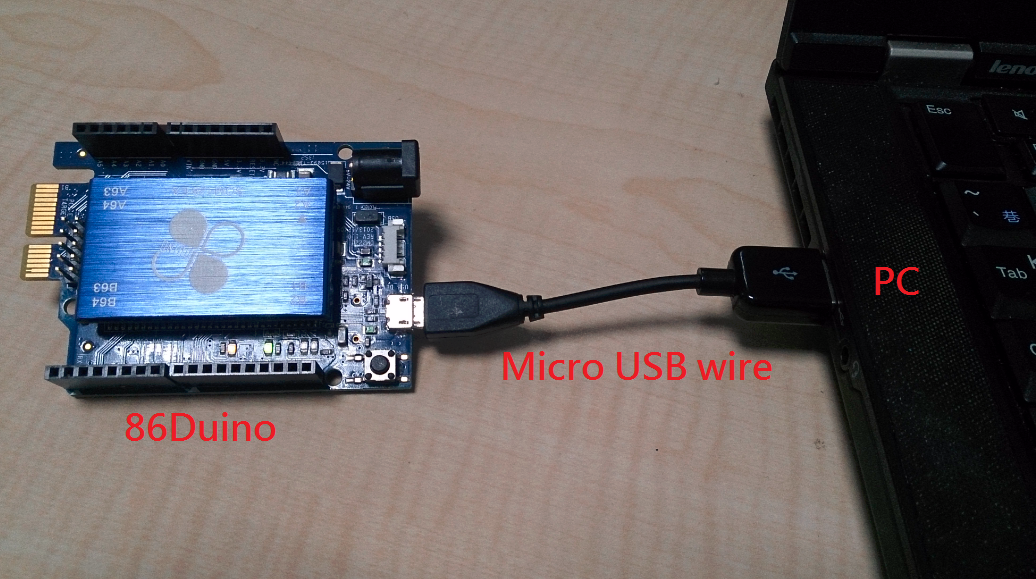
将安装好 L86duntu 的 SD 卡插上 86Duino,并用一条 USB 转接线连接 86Duino 和电脑,如下图:
步骤 3
当 L86duntu 成功开机后,电脑将会侦测到一个新装置,您会在 Windows XP 里看到如下画面:
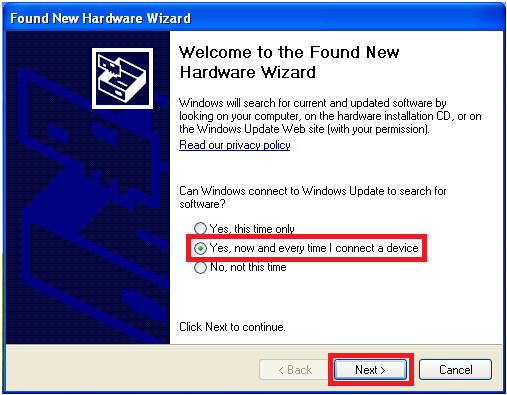
在画面上请选择 yes, now and every time I connect a device 选项,并点击 Next > 按钮。
步骤 4
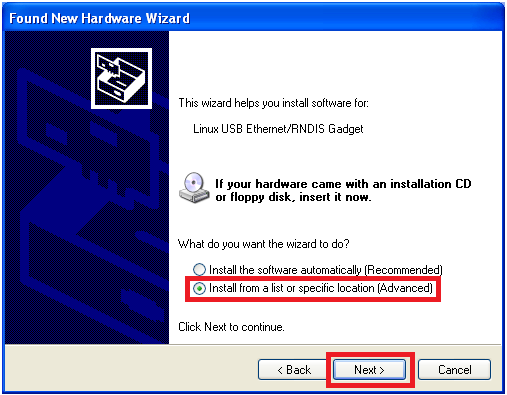
选择 Install from a list or specific location (Advanced) 选项,并点击 Next > 按钮。
步骤 5
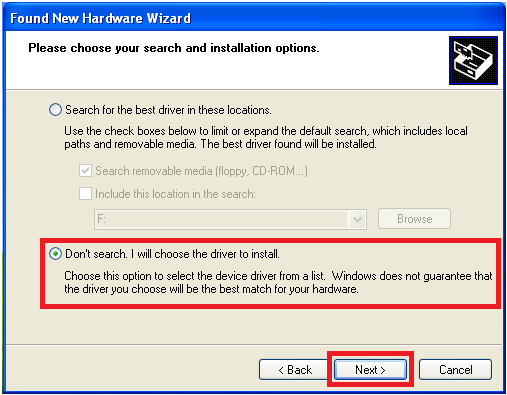
选择 Dont search. I will choose the driver to install. 选项,并点击 Next > 按钮。
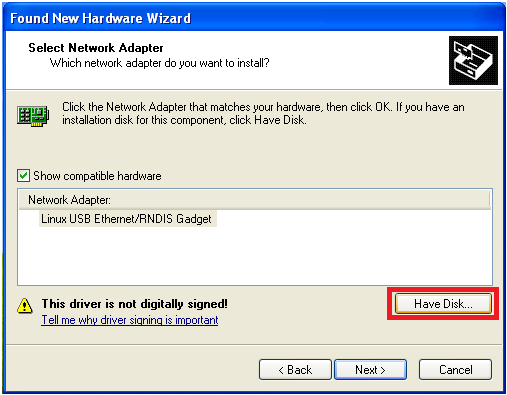
步骤 6
点击 Have Disk… 按钮。
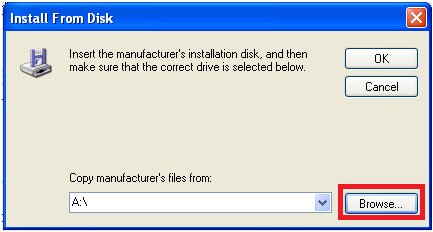
步骤 7
点击 Browse… 按钮。
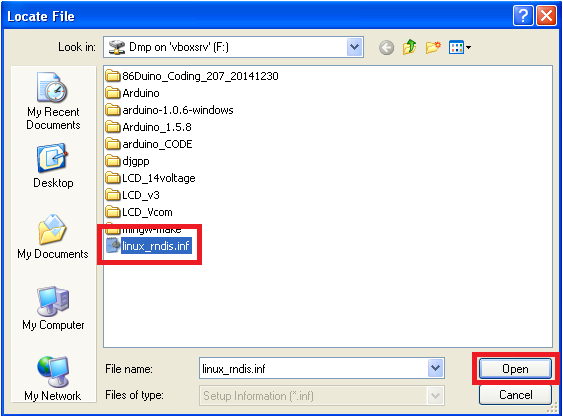
步骤 8
选择在步骤 1 解压缩好的驱动程式档案 linux_rndis.inf,接着点击 Open 按钮。
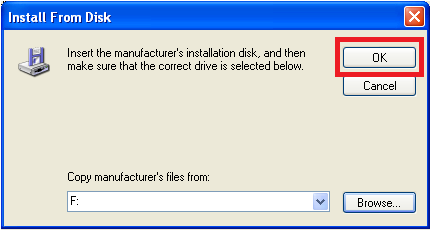
步骤 9
点击 OK 按钮。
步骤 10
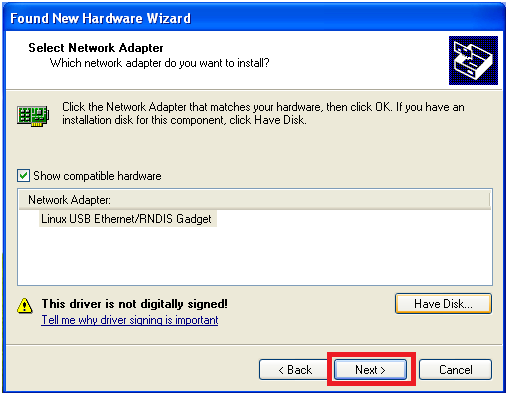
点击 Next > 按钮后,Windows XP 将会开始安装驱动程式:
步骤 11
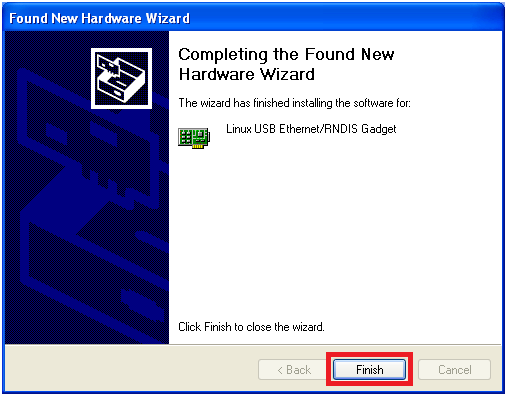
驱动程式安装完成后,将出现如下视窗,点击 Finish 按钮完成安装步骤。
步骤 12
接下来,我们要设定此虚拟网卡的 IP 位址。
打开控制台中的 网路连线 视窗:
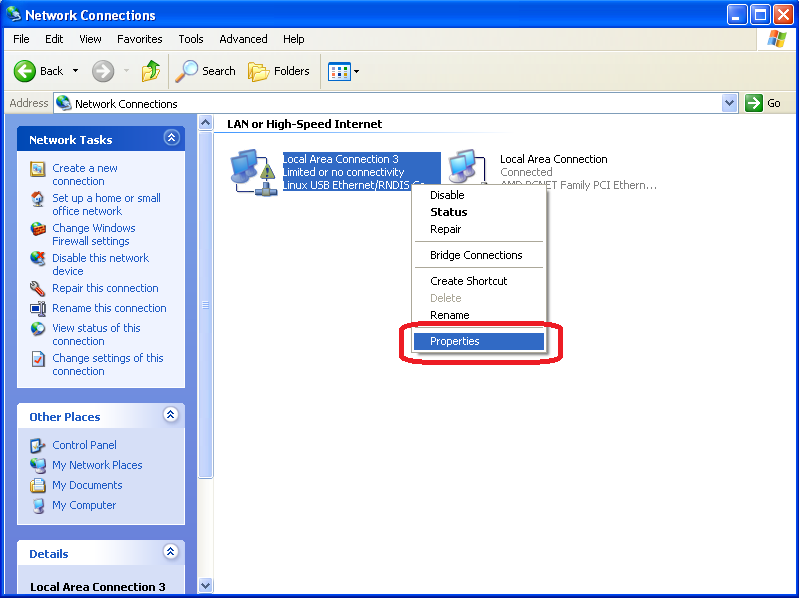
在对应 USB 虚拟网卡的图示(会显示 Linux USB Ethernet/RNDIS Gadget 描述文字)上开启滑鼠右键选单,点击选单中 Properties 选项开启网路设定视窗。
步骤 13
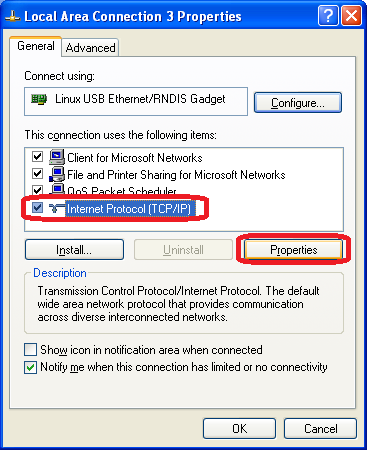
选择 Internet Protocol (TCP/IP) 并点击 Properties 按钮。
步骤 14
如下图,填入下列 IP 位址设定:
在 IP address 栏位输入 10.0.1.2
在 Subnet mask 栏位输入 255.255.255.0
在 Default gateway 栏位输入 10.0.1.1
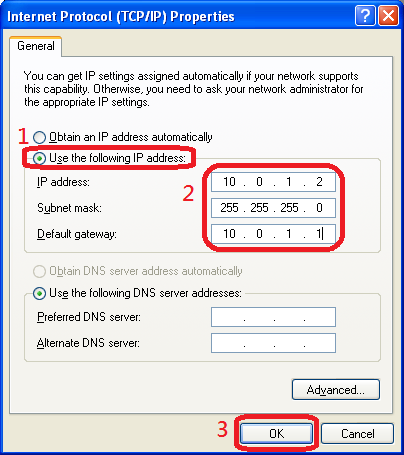
按下 OK 按钮后便完成 USB 虚拟网卡设定。
The text of the 86Duino reference is licensed under a Creative Commons Attribution-ShareAlike 3.0 License.