在 Windows 7 / Windows 8 上安装 USB 虚拟网路卡驱动程式
由于在 Windows 7 和 Windows 8 上面安装 USB 虚拟网路卡驱动程式的步骤皆相同,下面我们以 Windows 7 的操作画面为例,介绍如何安装 USB 虚拟网路卡驱动程式,以便透过 USB Device 介面与 L86duntu 进行网路连线。
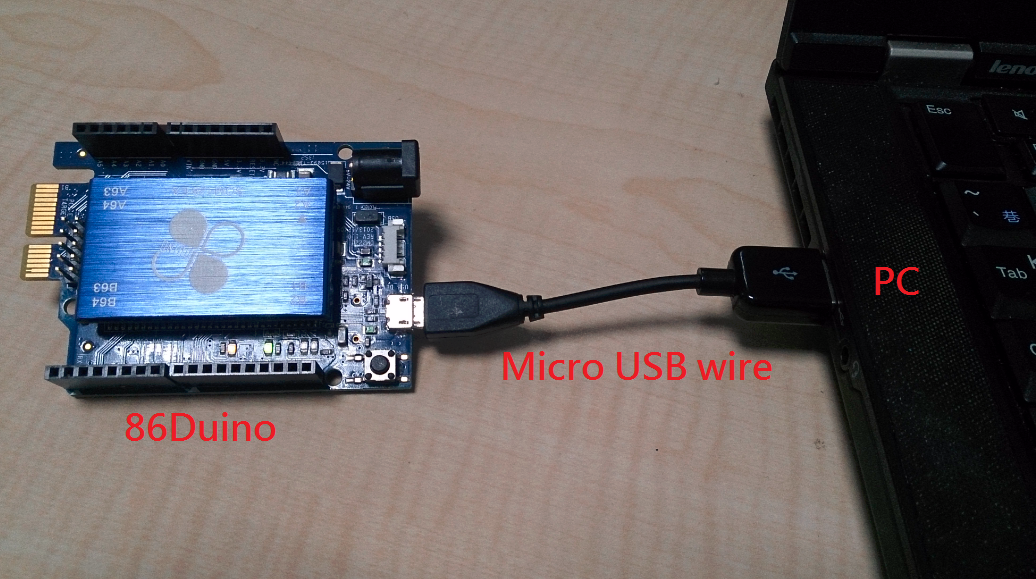
步骤 1
将安装好 L86duntu 的 SD 卡插上 86Duino,并用一条 USB 转接线连接 86Duino 和电脑,如下图:
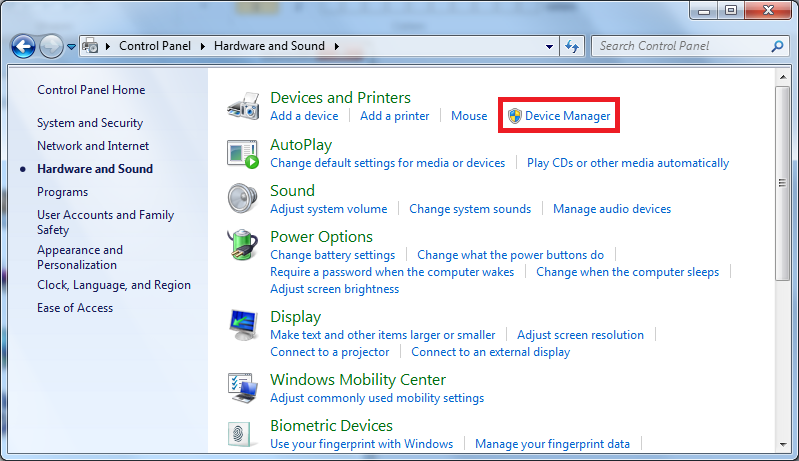
步骤 2
当 L86duntu 成功开机后,您应该会在控制台的装置管理员里,看到一个未知装置出现在 Other devices(其他装置)类别中,名称是 RNDIS/Ethernet Gadget:
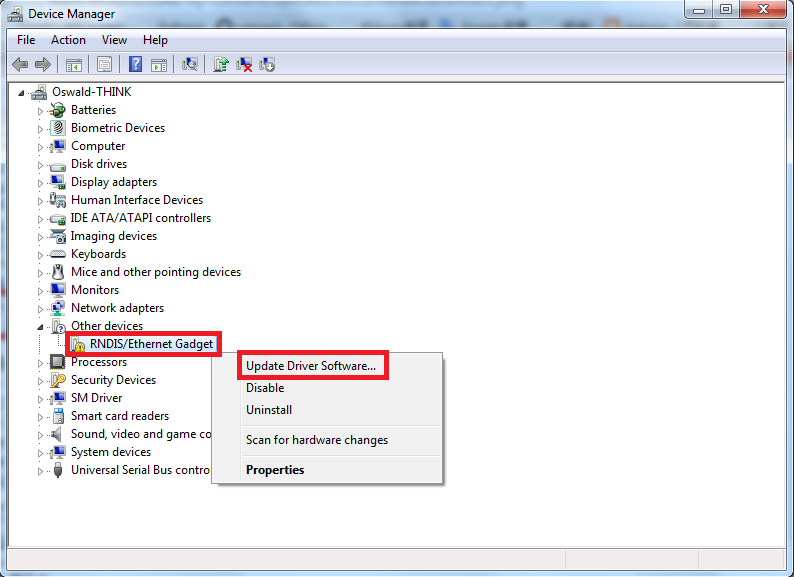
我们在 RNDIS/Ethernet Gadget 上面按滑鼠右键,然后选择 Update Driver Software…(更新驱动程式软体)选项。
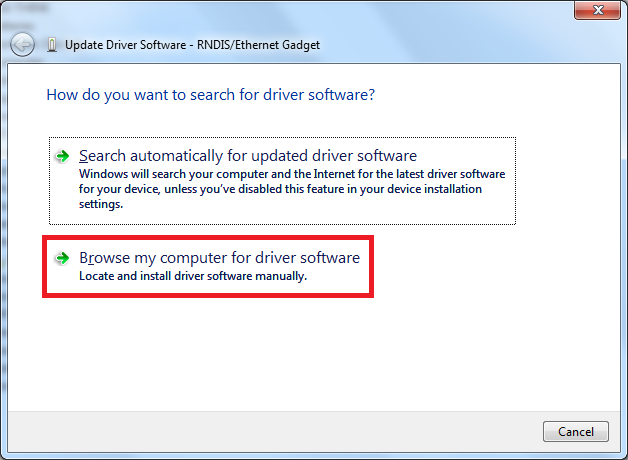
步骤 3
选择 Browse my computer for driver software(浏览电脑上的驱动程式软体)选项。
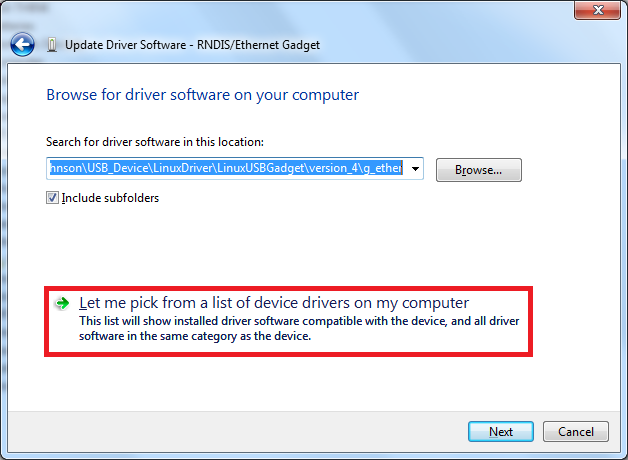
步骤 4
点击 Let me pick from a list of device drivers on my computer(让我从电脑上的装置驱动程式清单中挑选)。
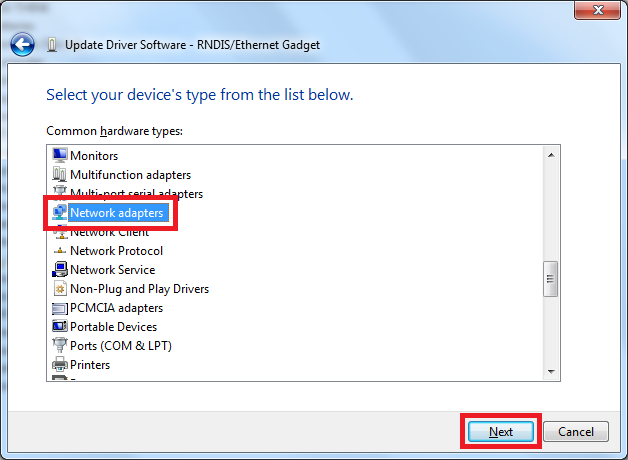
步骤 5
选择 Network adapters(网路介面卡)类别,并点击 Next 按钮。
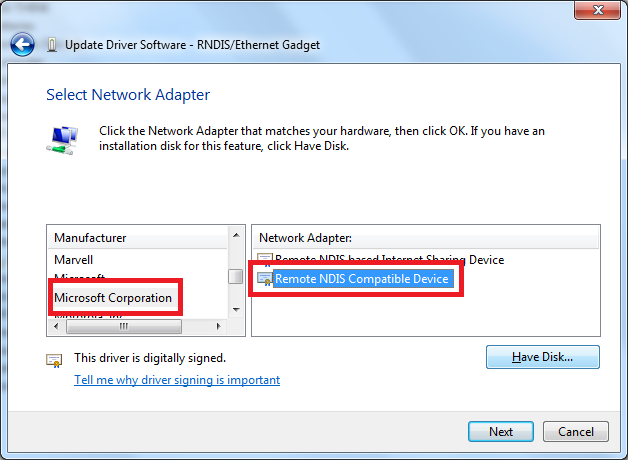
步骤 6
制造商选择 Microsoft Corporation,网路介面卡选择 Remode NDIS Compatible Device,然后点击 Next 按钮。
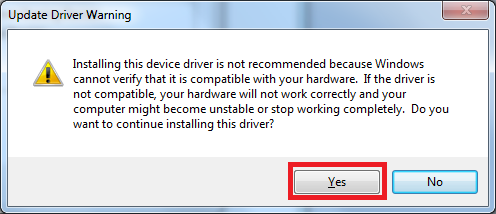
步骤 7
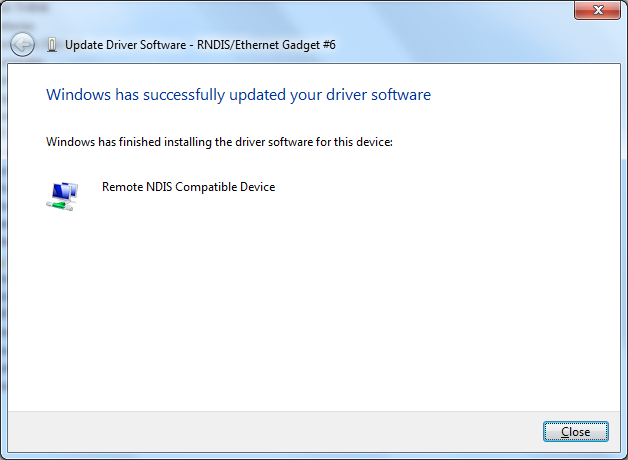
点击 Yes 按钮,系统将会开始安装驱动程式:
安装成功后,将显示如下讯息:
步骤 8
接下来,我们要设定此虚拟网卡的 IP 位址。
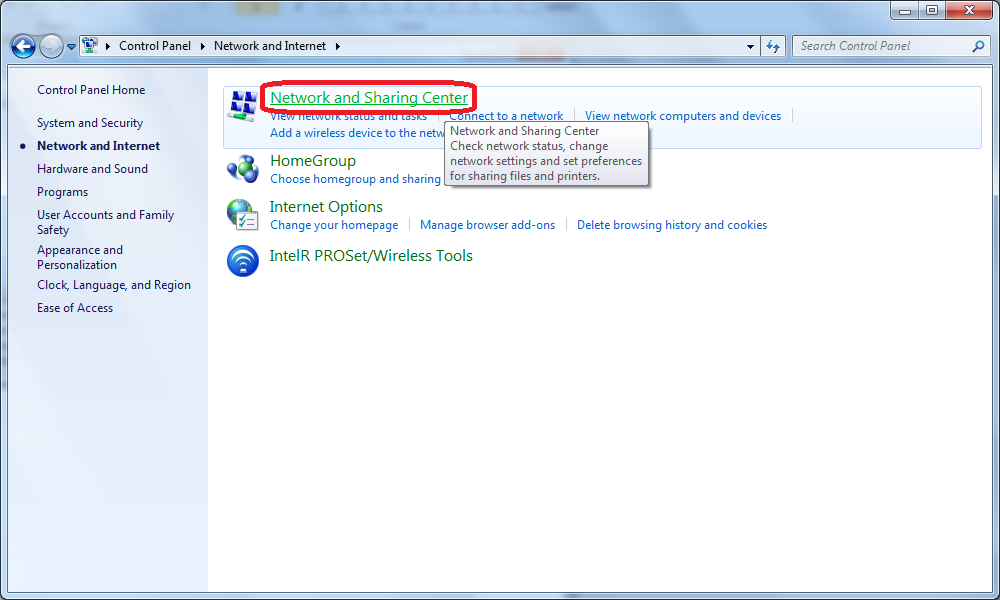
打开控制台点选 Network and Internet (网路和网际网路):

开启 Network and Sharing Center(网路和共用中心):
在对应 USB 虚拟网卡的网路上,点选 Local Area Connection(区域连线):
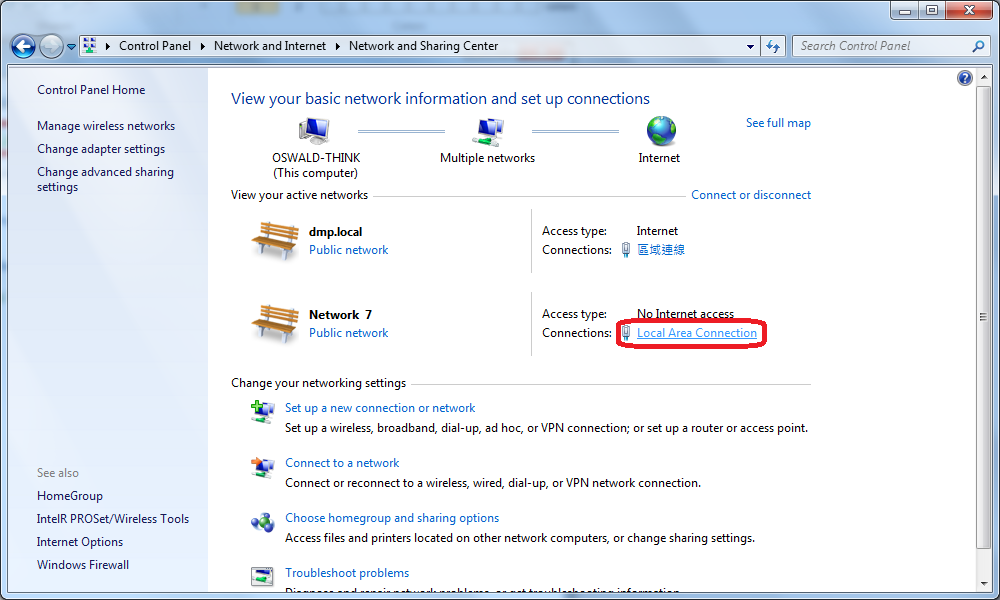
点击 Properties(内容)按钮开启网路设定视窗:
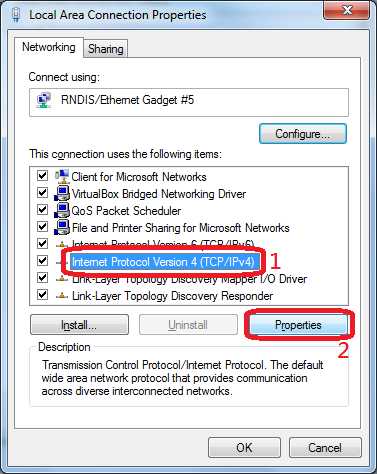
步骤 9
选择 “Internet Protocol Version 4 (TCP/IPv4)” 并点击 “Properties” 按钮。
步骤 10
如下图,填入下列 IP 位址设定:
在 IP address 栏位输入 10.0.1.2
在 Subnet mask 栏位输入 255.255.255.0
在 Default gateway 栏位输入 10.0.1.1
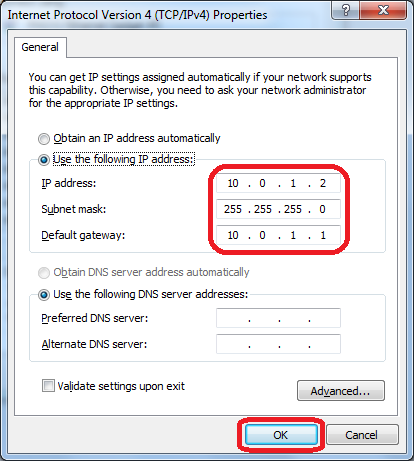
按下 “OK” 按钮后便完成 USB 虚拟网卡设定。
The text of the 86Duino reference is licensed under a Creative Commons Attribution-ShareAlike 3.0 License.