Connecting EtherCAT Slave Devices
EtherCAT is an Ethernet-based system invented by the German company Beckhoff Automation in 2003. It has become a major communication interface for connecting PLC and sensor, servo motors, I/O switches and automation equipment.
The devices within an EtherCAT system can divide devices to Master and Slave. The Master as the entire Web master controller, to be responsible for sending instant packets to each slave station to read data from the slave or control behavior. L86duntu-RT built-in IgH EtherCAT Master software can make the 86Duino a Master device in EtherCAT system.
IgH EtherCAT Master Introduction
IgH EtherCAT Master is an open source communication software tool that under Linux platform, the structure look like this:
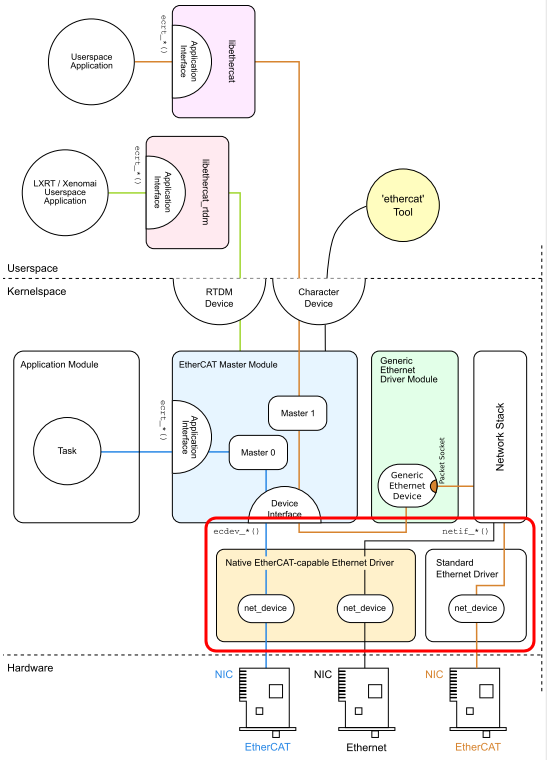
Figure: The red box represents where the IgH EtherCAT Master Ethernet drivers and EtherCAT slave device is connected. It shows where the Generic Ethernet driver connects into the Native EtherCAT-Capable Ethernet Drivers and Standard Ethernet Driver. The user must use the first driver to support real-time communication.
For different network cards that correspond to drivers different from the Native EtherCAT-Capable Ethernet Drivers, IgH EtherCAT Master will default to supporting the Realtek 8139,8169 series and Intel e100, e1000 series web chip. We have also added the 86Duino built-in network card R6040 for a dedicated Native EtherCAT-Capable Ethernet Drivers; this allows for an EtherCAT real time communication on the 86Duino.
IgH EtherCAT Master SDK
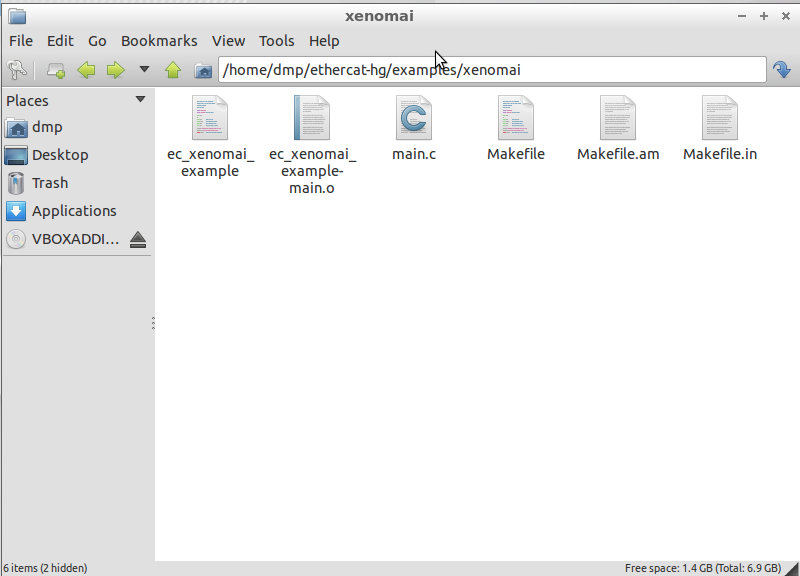
L86duntu-RT user can use build in IgH EtherCAT Master SDK write an application program for EtherCAT, the programming can refer to the IgH EtherCAT Master of the source of the example folder path as follows:
/home/dmp/ethercat-hg/example
In the example folder, there is a folder name xenomai, the content is a example that Real-Time Driver Model(RTDM) doing EtherCA real time communication:
We are going to use the 86Duino One as an example, how to connect EtherCAT slave device via Ethernet cable and use the IgH EtherCAT Mater to control.
Preparation
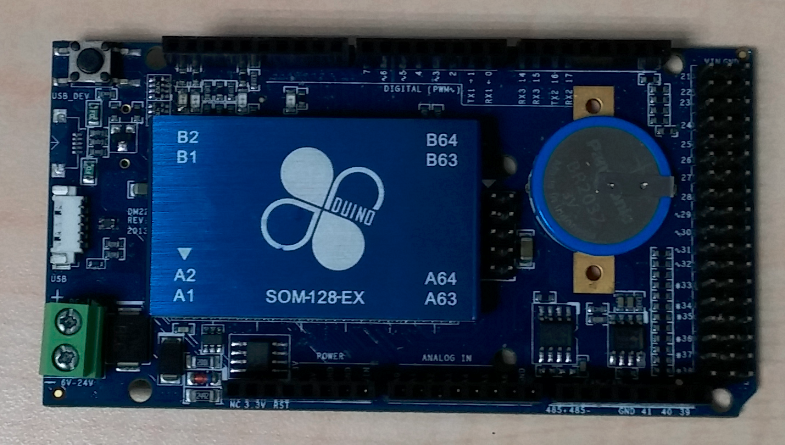
An 86Duino board:
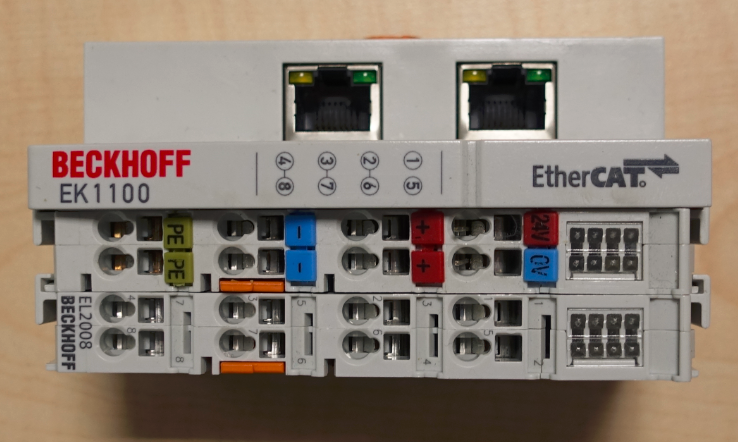
One EtherCAT slave device (In this example, we are using the BECKOFF EK1100):
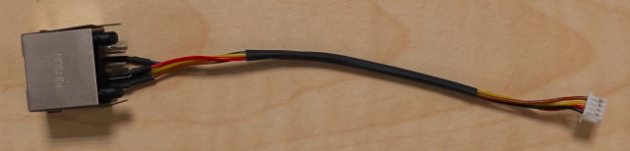
RJ45 internet connector with wires that is included with 86Duino One Cable Set:
Step 1
Put a MicroSD card that already has a pre-installed version of L86duntu-RT into 86Duino and also connect the RJ45 network cable.
Step 2
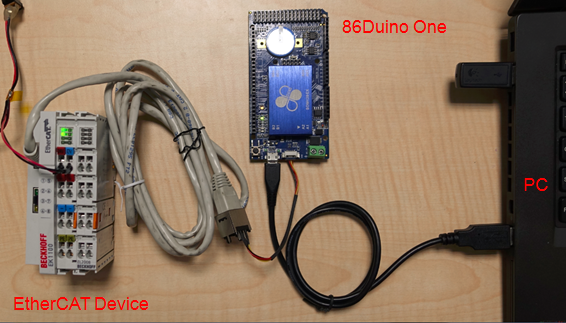
Use an internet cable to connect the 86Duino and EtherCAT slave device like in the following picture:
Step 3
Boot up 86Duino and login to the L86duntu-RT with VNC Viewer (Please see here to learn how to use VNC Viewer login)
Step 4
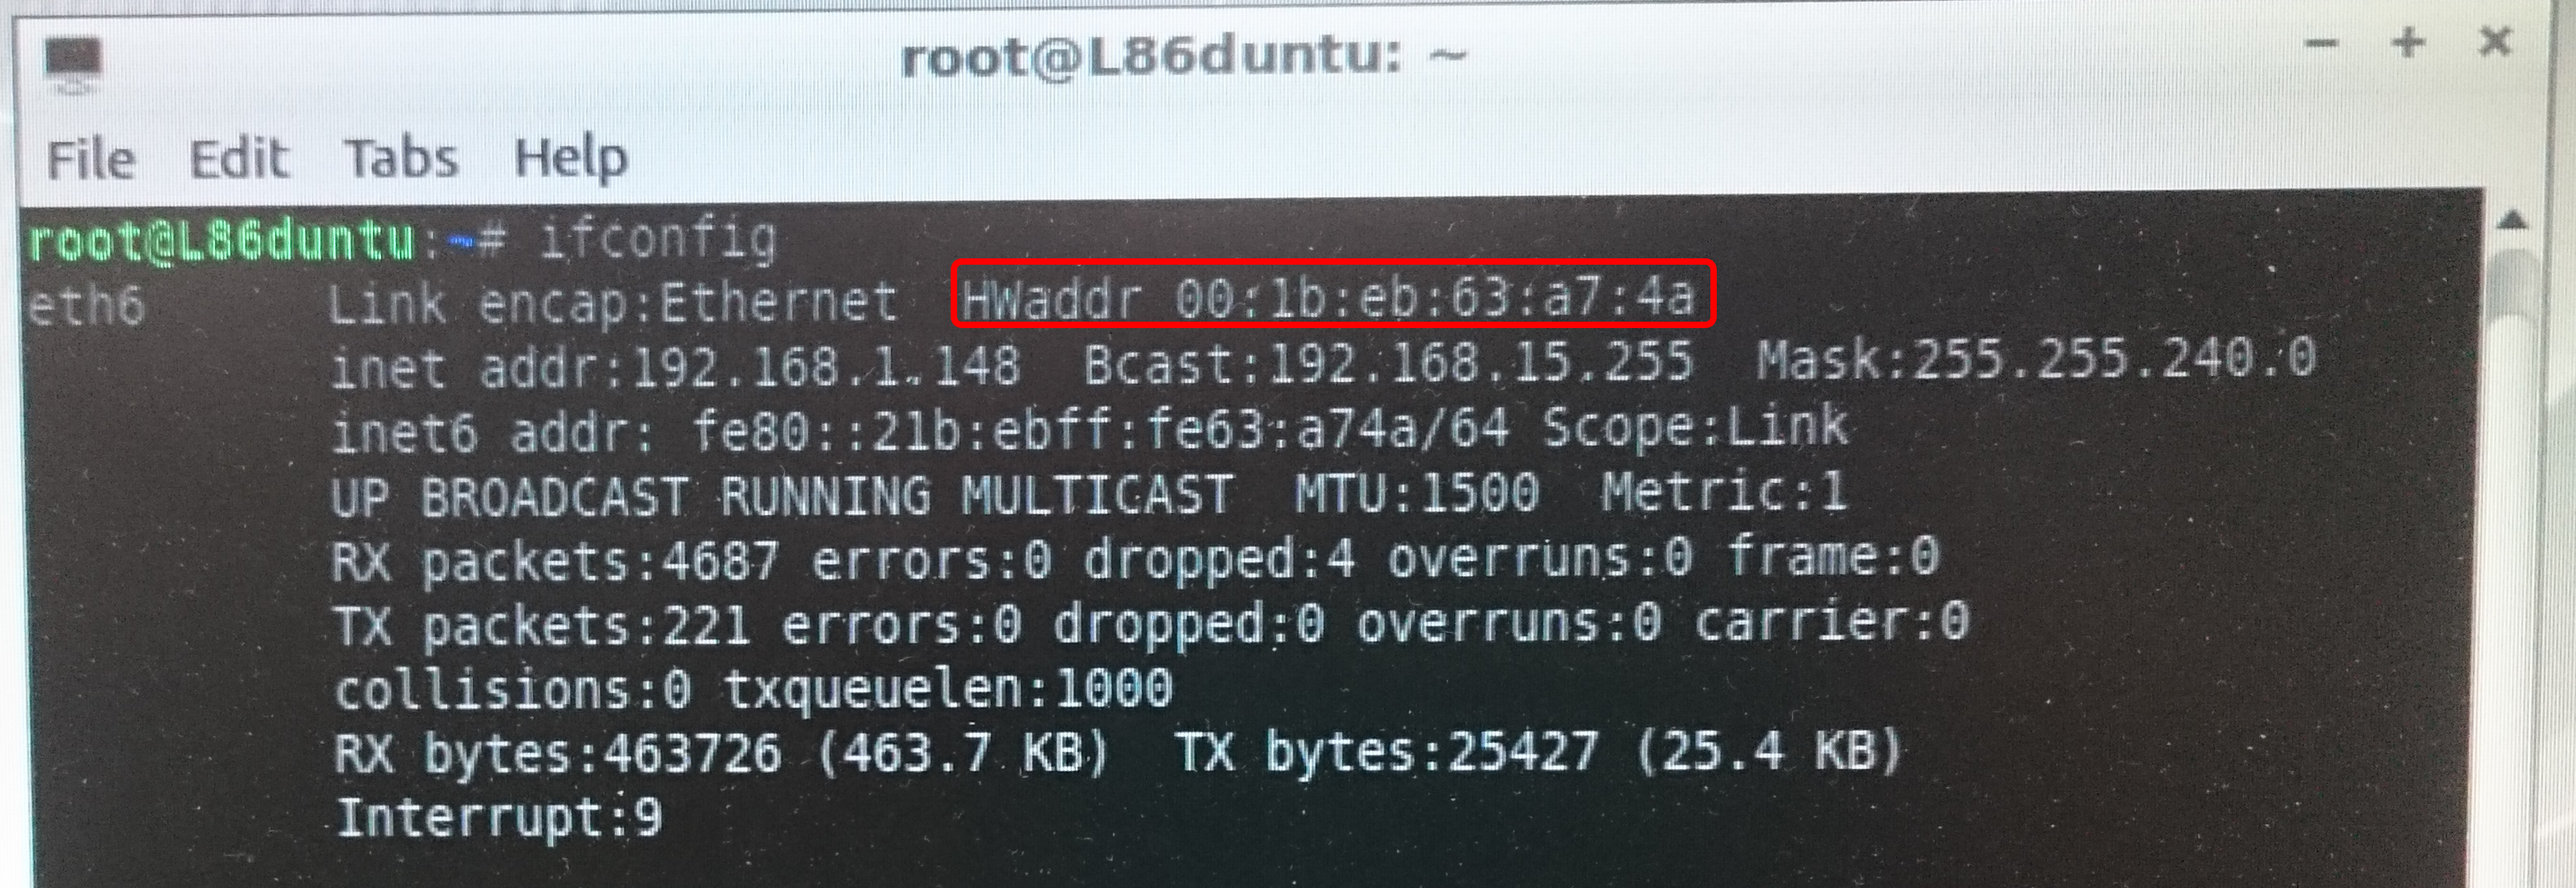
After logging in to L86duntu-RT, open the terminal and enter command ifconfig to check the MAC address for the 86Duino network adapter as shown below:
Step 5
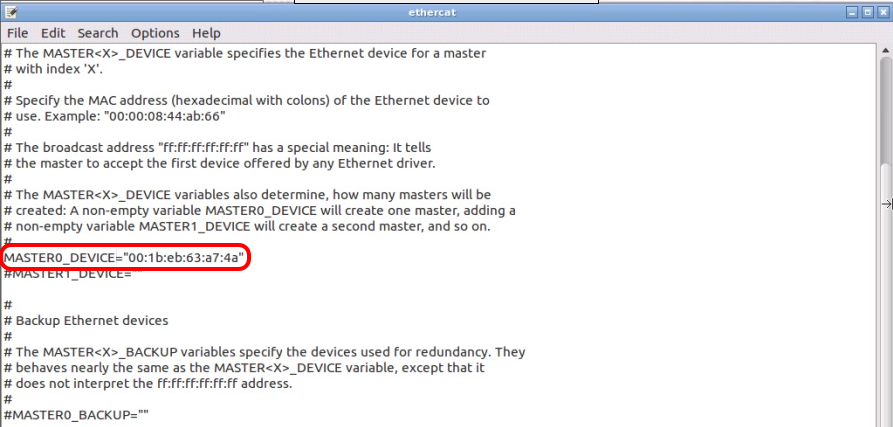
Now open the file /etc/sysconfig/ethercat and enter the MAC address for the Network adapter:
Step 6
Enter the following command to execute IgH EtherCAT Master’s shell script:
./etc/init.d/ethercat start

Step 7
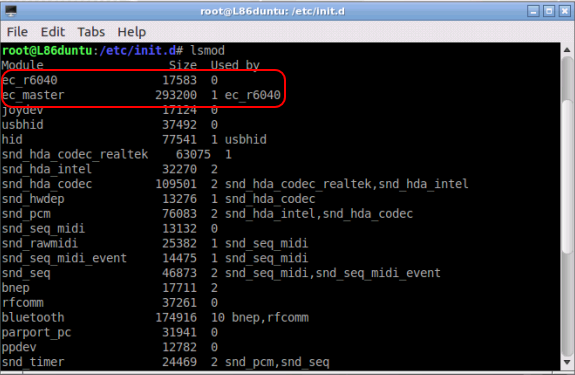
Enter lsmod to check the driver and you should be able to see the IgH EtherCAT Master driver in the list:
Step 8
Enter the following command:
ethercat slaves
You are going to see the name of the device that is connected to EtherCAT device. In this example, there are two devices, the EK1100 and EL2008, shown in the following picture:

This indicates the EtherCAT slave is already connected. You can enter any of the commands that are supported by IgH EtherCAT Master to control EtherCAT slave. The list of available command can be found on the IgH EtherCAT Master Website
Appendix:Test 86Duino running Xenomai core realtime performance
Please enter the following command at the terminal:
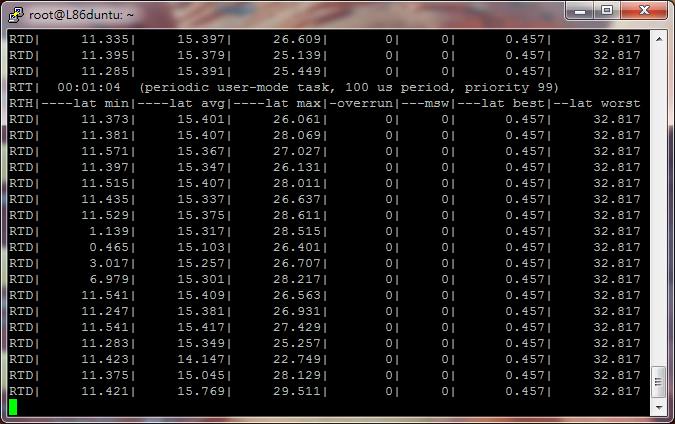
xeno-test latency
You will see the data for real time performance for Xenomai core (The average latency is about 15us for 86Duino running Xenomai core), shown below:
The text of the 86Duino reference is licensed under a Creative Commons Attribution-ShareAlike 3.0 License.