Getting Started with 86Duino on Windows
This document explains how to connect your 86Duino board to the computer and upload your first sketch.
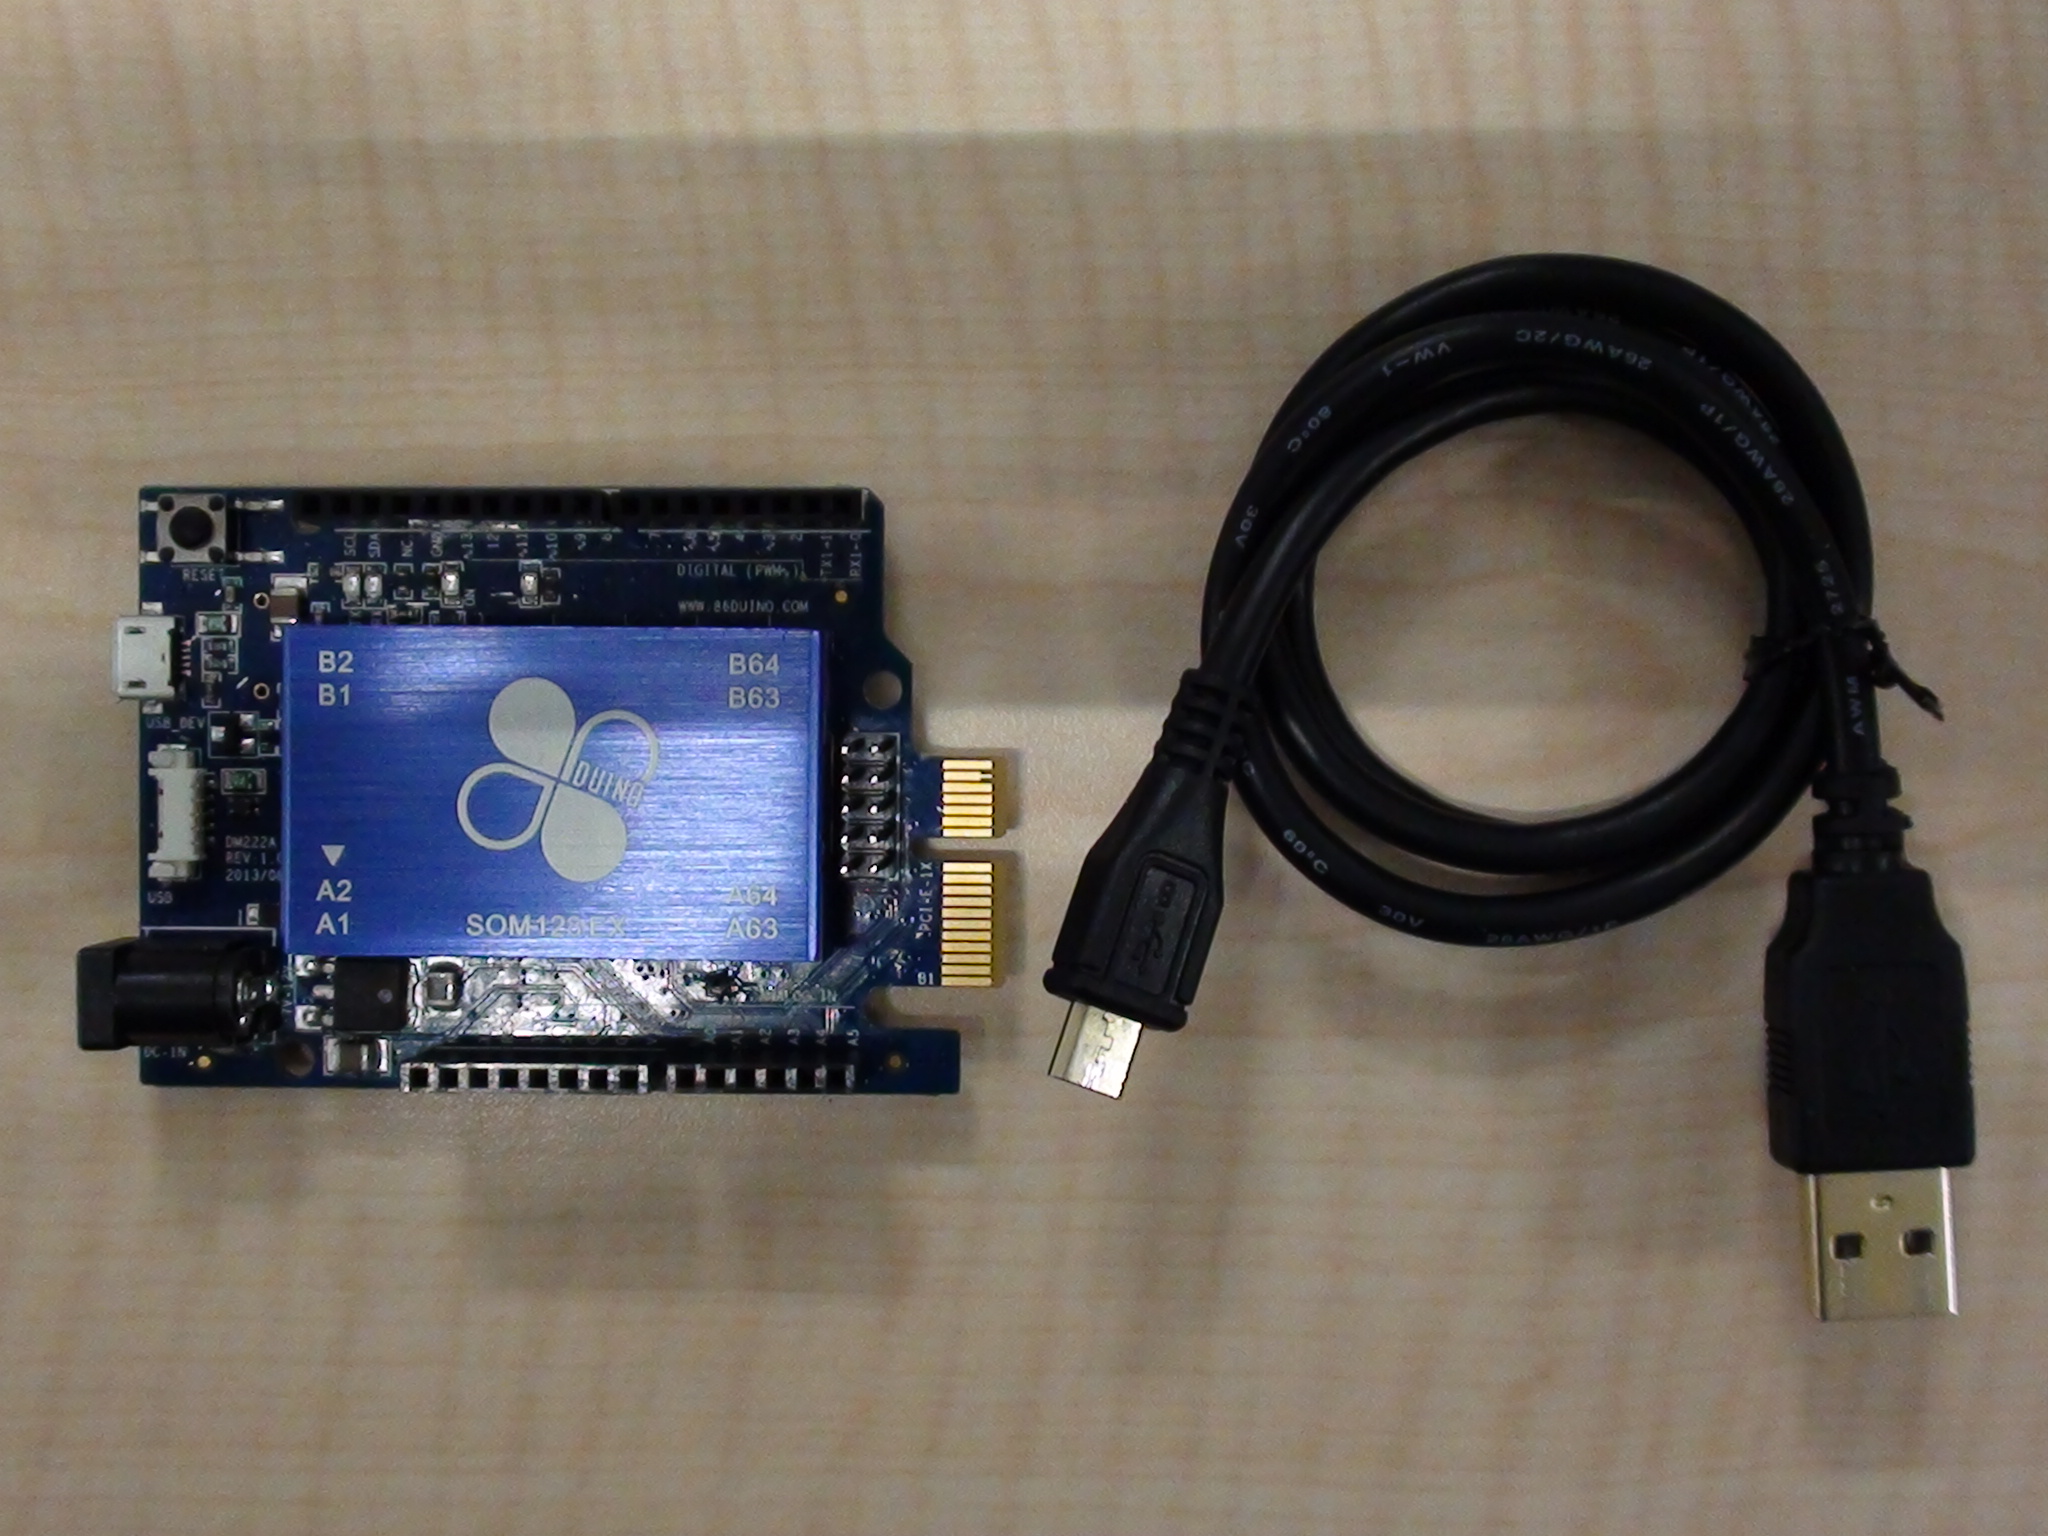
1) Get an 86Duino board and USB cable
In this tutorial, we assume you’re using an 86Duino Zero, 86Duino One, or 86Duino EduCake.
You also need a standard USB cable (MicroUSB to USB): the kind you would connect to a smartphone, for example.
2) Download the 86Duino Coding environment
Get the latest version from the download page.
When the download finishes, unzip the downloaded file. Make sure to preserve the folder structure. Double-click the folder to open it. There should be a few files and sub-folders inside.
3) Connect the board
Connect the 86Duino board to your computer using the USB cable. The power LED should go on.
4) Install the drivers
If you use Windows 10, the necessary driver has been installed in Windows 10, you don’t install the 86Duino driver under Windows 10, ignore this step and go to step 5.
If you want to install 86Duino driver instead of the default driver on Windows 10, follow the steps as below:
- Click on the Start Menu.
- Click the Settings option.
- In the Settings window, click the Update & security option.
- In the Update & security window, click the Recovery option and then click Restart now button.
- Then you shall see the Choose an option window. Select the Troubleshoot option.
- In the Troubleshoot window, select the Advanced options option.
- In the Advanced options window, select the Startup Settings option.
- In the Startup Settings window, press the Restart button.
- After your computer restarts, the Startup Settings window shall appear again; in that window, press “7” or “F7” to select the Disable driver signature enforcement option.
- Then you will see the desktop again.
- Click on the Start Menu, and click Settings option.
- While in the Settings window, click Devices option.
- In Printer & Scanner page, click Device Manager option.
- Look under Ports (COM & LPT). You should see an open port named USB Serial Device (COMn) which is the default driver on Windows10.
- Right click on the USB Serial Device (COMn) port and choose the Update Driver Software option.
- Next, choose the Browse my computer for Driver software option.
- Finally, navigate to and select the driver file named
86Duino.inf, located in theDriversfolder of the 86Duino Coding software download. - In installing process, if you see the Windows Security windows, select Install this driver software anyway option.
- Windows will finish up the driver installation from there.
If you use Windows 8, you should first disable the driver signature with the following steps before installing the driver :
- Open the Run window and execute the command:
shutdown.exe /r /o /f /t 00. - Then you shall see the Choose an option window. Select the Troubleshoot option.
- In the Troubleshoot window, select the Advanced options option.
- In the Advanced options window, select the Startup Settings option.
- In the Startup Settings window, press the Restart button.
- After your computer restarts, the Startup Settings window shall appear again; in that window, press “7” or “F7” to select the Disable driver signature enforcement option.
- Now you can follow the Windows XP/7 steps below to install the driver.
If you use Windows XP/7, you can follow the steps below to install the driver :
- Plug in your board and wait for Windows to begin it’s driver installation process. After a few moments, the process will fail, despite its best efforts.
- Click on the Start Menu, and open up the Control Panel.
- While in the Control Panel, navigate to System and Security. Next, click on System. Once the System window is up, open the Device Manager.
- Look under Ports (COM & LPT). You should see an open port named Vortex86EX USB Device or EX Interface 0.
- Right click on the Vortex86EX USB Device or EX Interface 0 port and choose the Update Driver Software option.
- Next, choose the Browse my computer for Driver software option.
- Finally, navigate to and select the driver file named
86Duino.inf, located in theDriversfolder of the 86Duino Coding software download. - Windows will finish up the driver installation from there.
For step-by-step screenshots, see:
- screenshots under Windows 10
- screenshots under Windows 8
- screenshots under Windows 7
- screenshots under Windows XP
5) Launch the 86Duino application
Double-click the 86Duino application. (Note: if the 86Duino software loads in the wrong language, you can change it in the preferences dialog. See the environment page for details.)
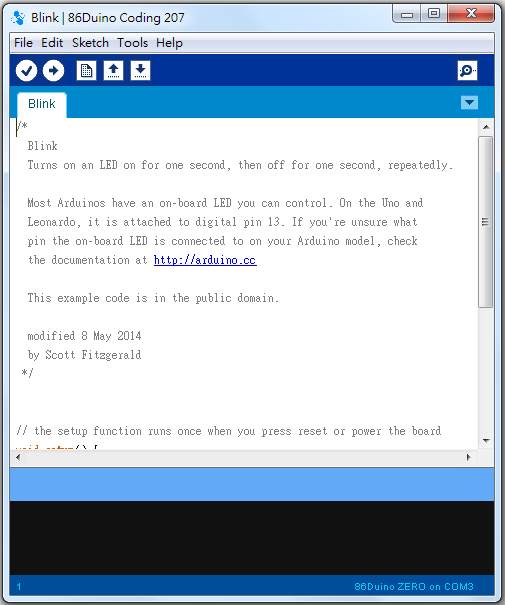
6) Open the blink example
Open the LED blink example sketch: File > Examples > 1.Basics > Blink.
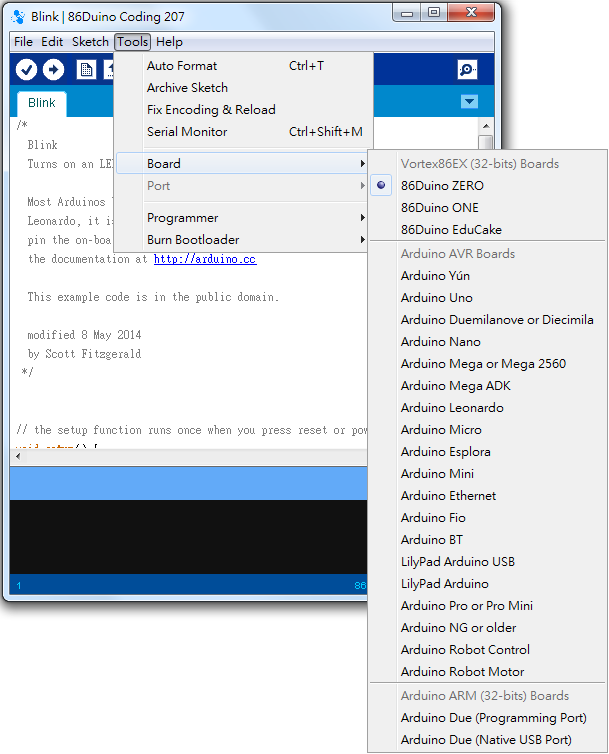
7) Select your board
You’ll need to select the entry in the Tools > Board menu that corresponds to your 86Duino.
8) Select your serial port
Select the serial device of the 86Duino board from the Tools > Serial Port menu. This is likely to be COM3 or higher (COM1 and COM2 are usually reserved for hardware serial ports). To find out, you can disconnect your 86Duino board and re-open the menu; the entry that disappears should be the 86Duino board. Reconnect the board and select that serial port.
9) Upload the program
Now, simply click the “Upload” button in the environment. Wait a few seconds – on the 86Duino Zero and One, you should see the RX and TX leds on the board flashing. If the upload is successful, the message “Done uploading.” will appear in the status bar.
![]()
A few seconds after the upload finishes, you should see the pin 13 LED on the board start to blink. If it does, congratulations! You’ve gotten 86Duino up-and-running.
If you have problems, please ask in the forum.
The text of the 86Duino reference is modified from Arduino’s guides and is licensed under a Creative Commons Attribution-ShareAlike 3.0 License.