Extend L86duntu Storage Space (Linux)
When we restore the L86duntu image to a microSD card with capacity over 8GB (eg. 16GB, 32GB, etc), the space occupied by the L86duntu image will be around 8GB, with the remainder being unused. We are going to show you how can you enable the
SD card’s full capacity to be used in L86duntu.
Extend L86duntu Storage Space
Step 1
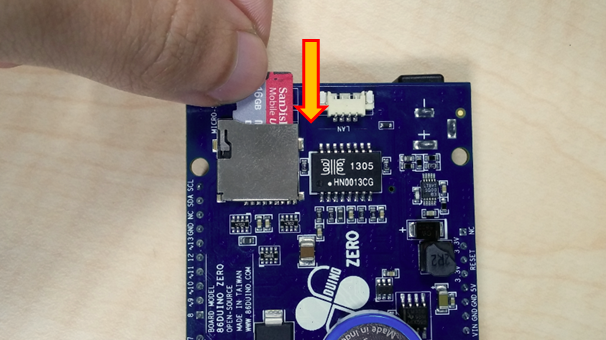
We are using a 16GB microSD card as an example. Install the L86duntu image into the storage device and connect drive to system.
Step 2
We install a toll “GParted” on linux (eg. Ubuntu). Please type the following:
apt-get install gparted

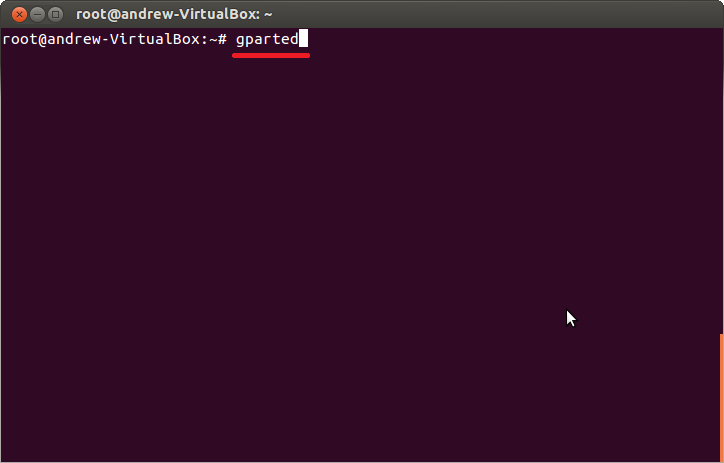
Step 3
After it finishes, please type the following to run GParted:
gparted
Step 4
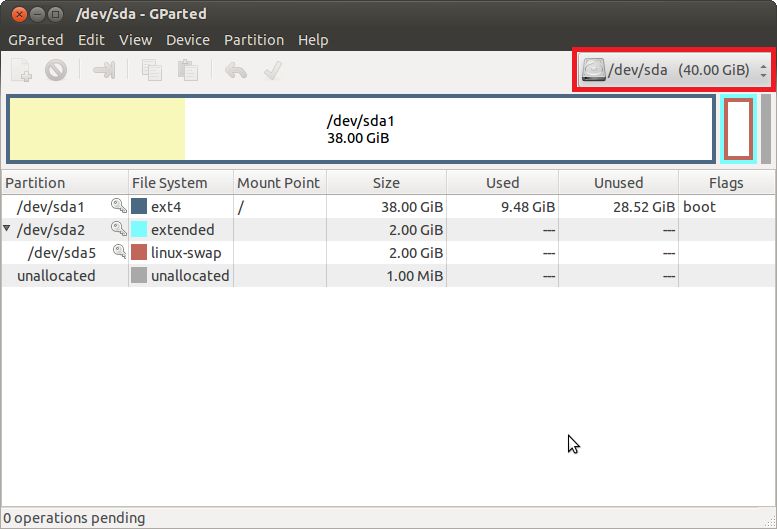
GParted will automatic detect all the memory drive on your computer and the screen should display the following:

Step 5
In the previous image you can see GParted showing the status of all the storage drives. We can see /dev/sda (main system drive) on the top right corner.
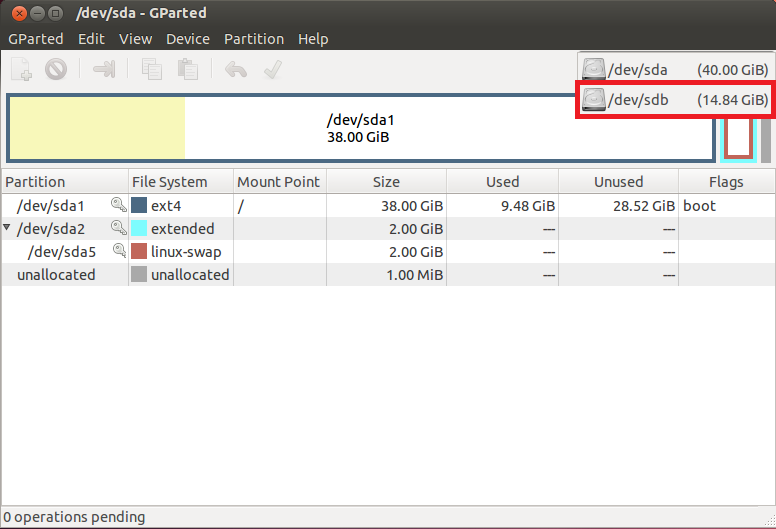
Step 6
Click on the top right corner for a pull-down menu and select the L86duntu drive you plugged in earlier (make sure you have the correct drive). In our example, the L86duntu is represented by /dev/sdb:
Step 7
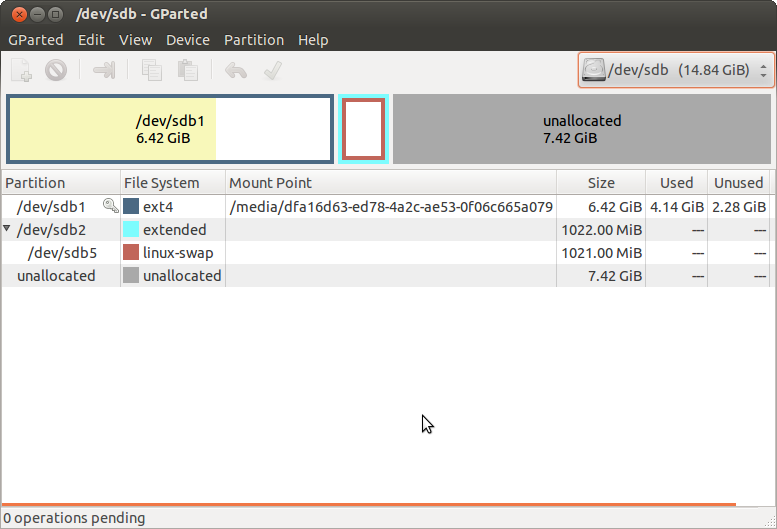
After selecting L86duntu, GParted will show you the separate status for the storage devices: one for 6.42GiB (/dev/sdb1) and the other one (/dev/sdb5) and the unallocated memory for 7.4GiB.
Step 8
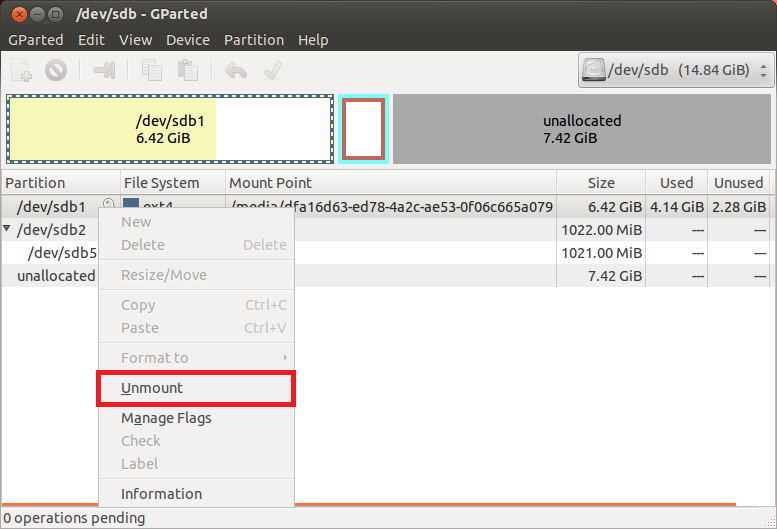
There is a key symbol on right side of /dev/sdb1, that indicates the drive is already mounted. Right click on /dev/sdb1 and then select “Unmount”
Step 9
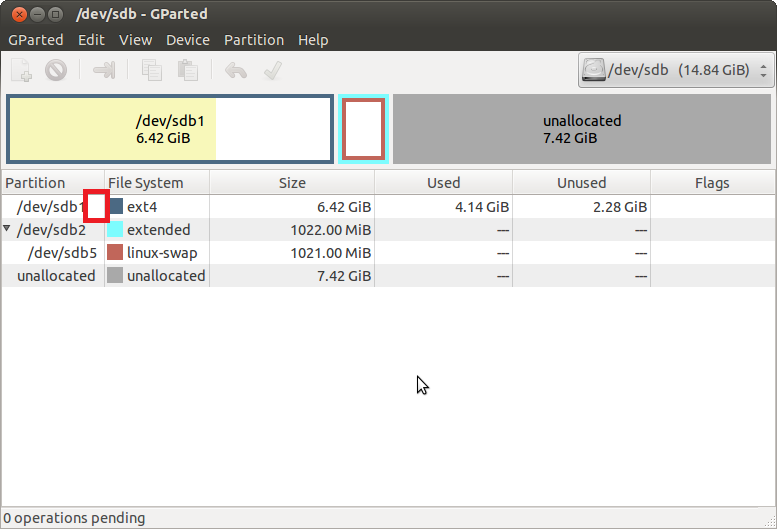
After unmounting, the key symbol will disappear and indicate that the “unmount” has been completed.
Step 10
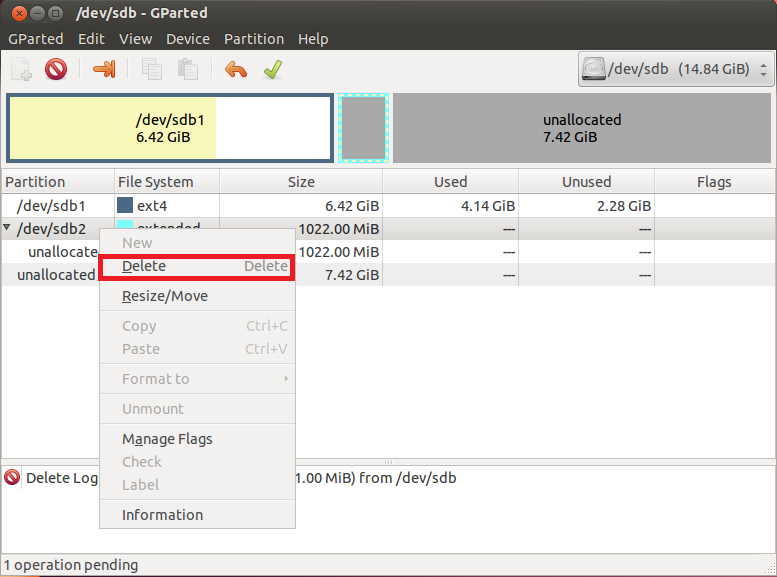
Now, right click on “linux-swap” area and then select “Delete.”
Step 11
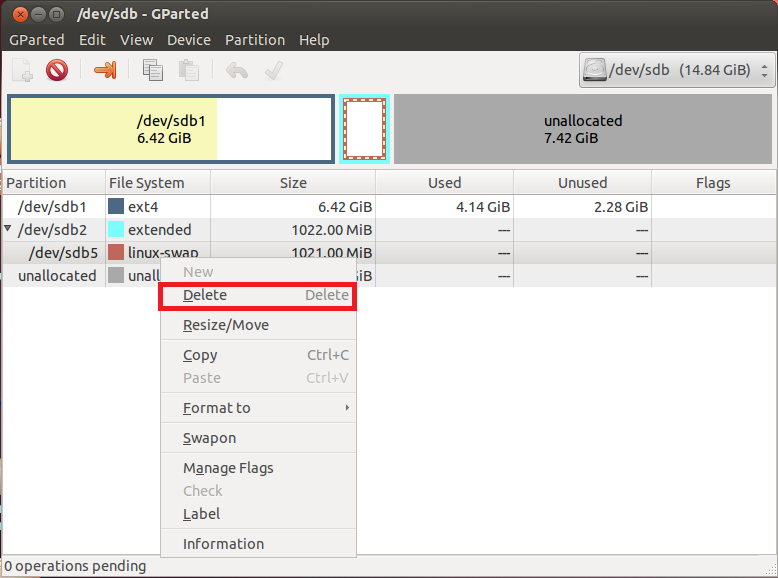
Once completed, right click on the “extended” area and select “Delete” to delete this partition:
Step 12
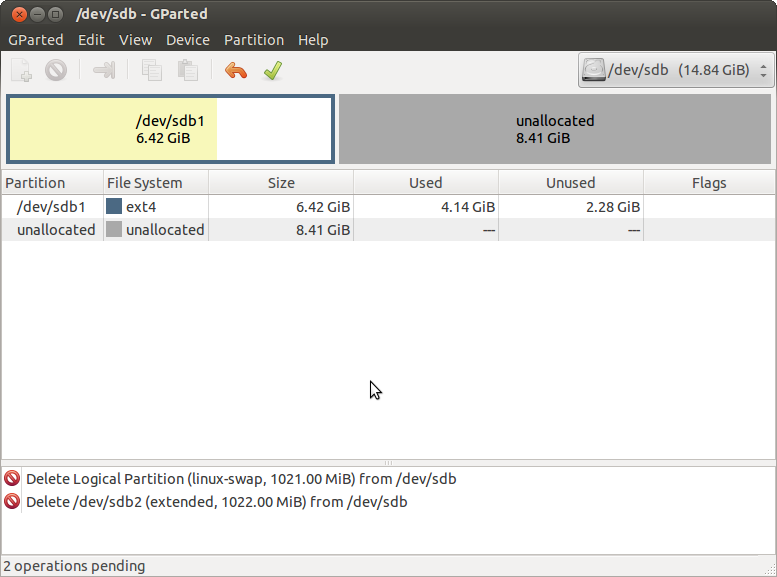
After choosing to delete the partition (GParted has not yet applied the action of deleting the selected partition), you will see a space 6.14GiB for L86duntu and another 8.41GiB that is unallocated.
Step 13
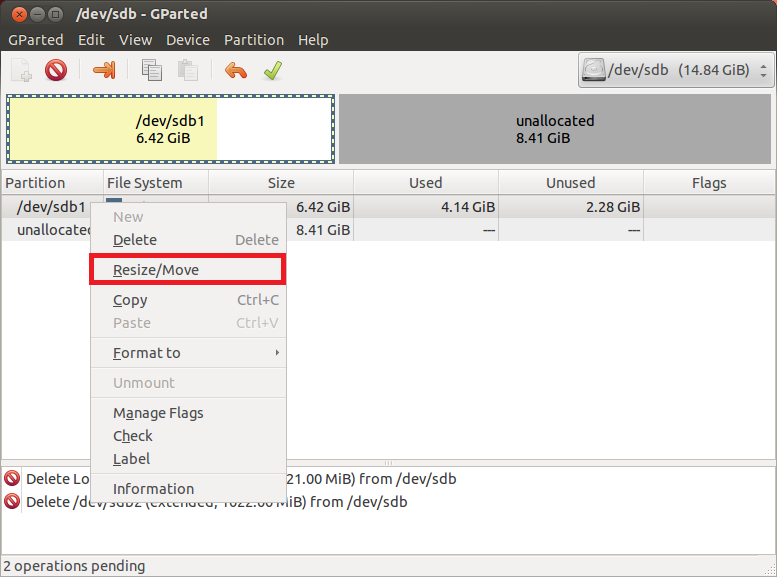
Right click on /dev/sdb1 area and select “Resize/Move”:
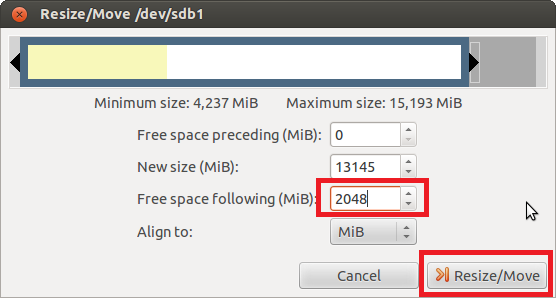
Step 14
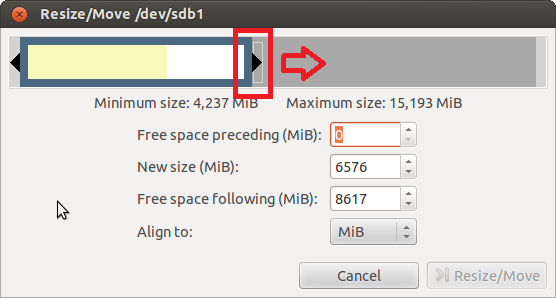
Now another window will allow for space adjustment, please left click and hold the mouse on the edge of the adjust bar, move to the right side and you can increase L86duntu storage space. Our storage device is 16GB and by moving the right side we can increase the space to ~14GB (the actually space is less than 14GB). The remaining 2GB can used to swap storage space (we don’t recommend swapping spaces less than 1GB).
Click on “Resize/Move” button when complete:
Step 15
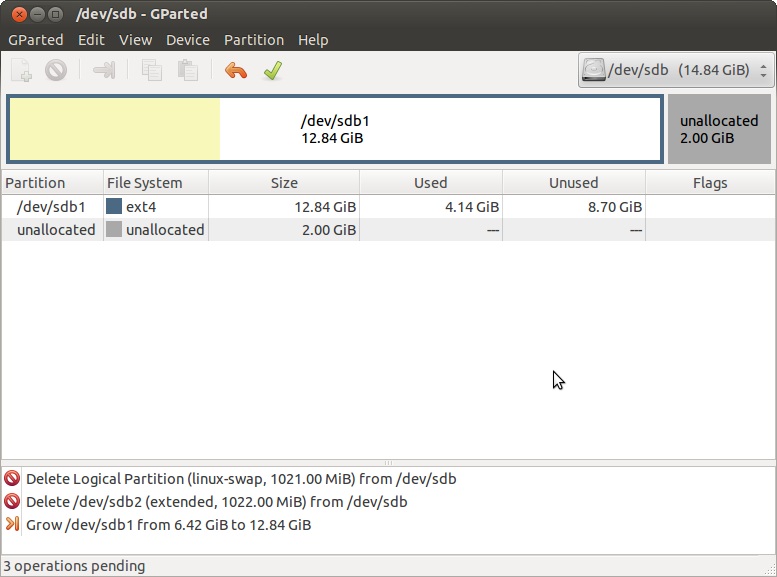
GParted will record your setting and then return to the main screen. Now you can see that the L86dunu storage space has extended to 12.84GiB and also 2GiB in unallocated space.
Step 16
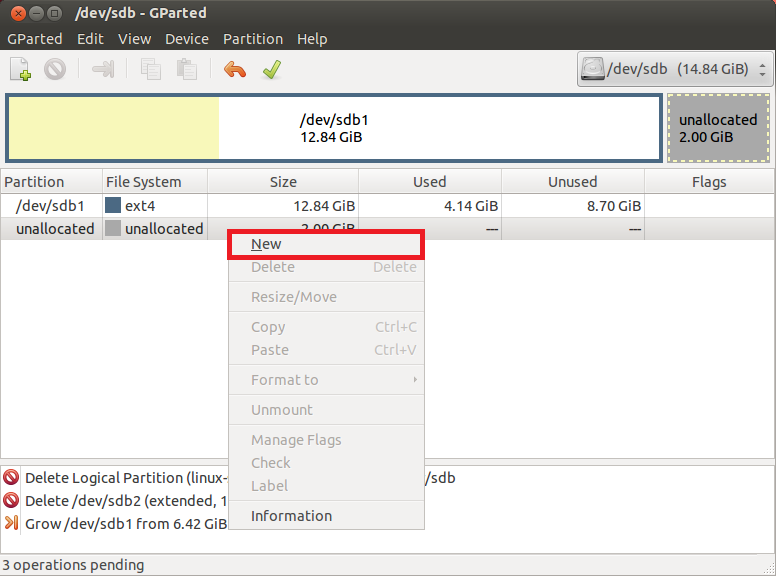
We can set up the 2GB space for swapping by right-clicking on “unallocated” and select “New”:
Step 17
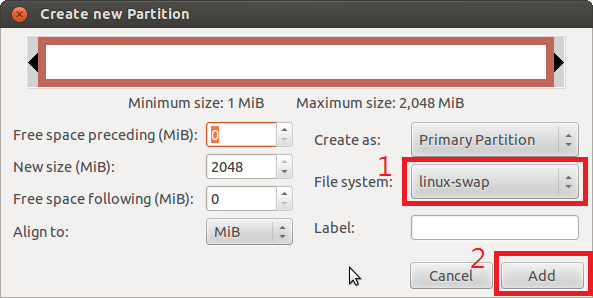
GParted will pop out a windows for partitioning. We can now make this space swappable. Pull down the window from “File system” and then click on “linux-swap” and click “Add.”
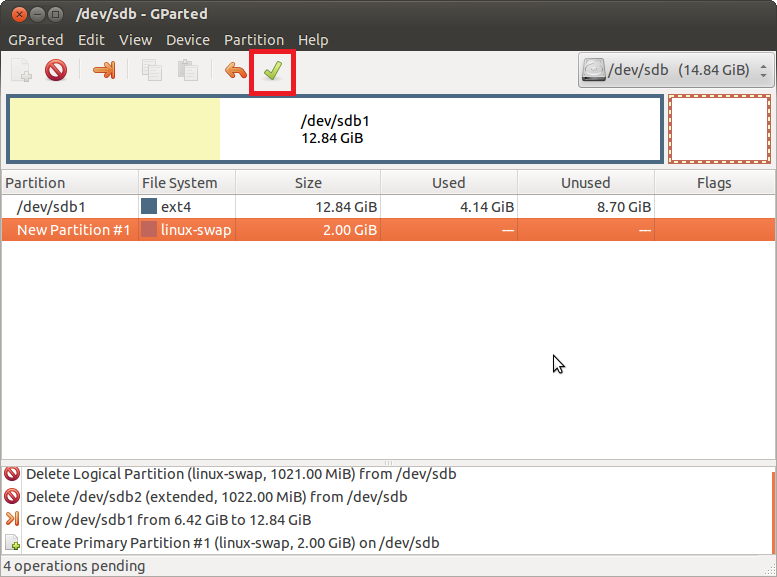
Step 18
After completing these steps, return to the main screen. Now we are ready to apply the changes to the microSD card for all the settings that were just made. Please click on the green symbol on top to “Apply” these changes.
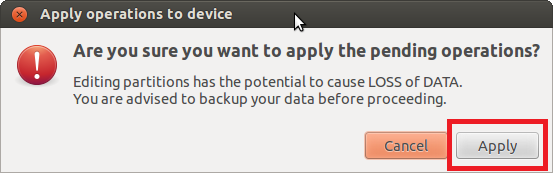
Step 19
Now GParted will pop out a warning window and ask if you would like to continue. Please click on “Apply”:
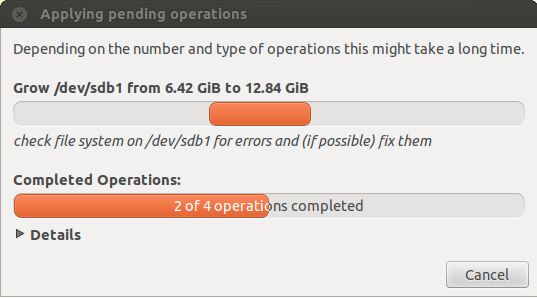
GParted will begin applying the modified settings made onto the microSD card.
Step 20
Please wait a few minutes for the program to finish (i.e. all operations successfully completed).
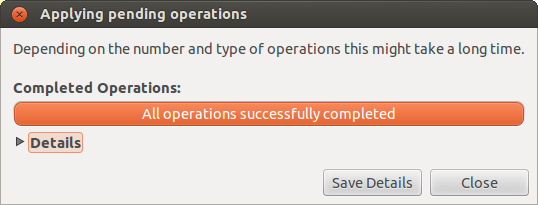
Click on “Close” to close the tool.
Step 21
After successfully extending the storage space, we can install the microSD card into the 86Duino.
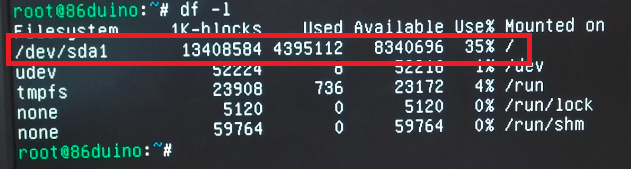
Step 22
Boot up the system to get in L86duntu and type the following to check if the storage space extended.
df -l
Setting up swap partition
Because we have changed the swap location in L86duntu, it will be different from its previous location in /etc/fstab. We will need to update /etc/fstab and make it automatically use the new swap partition when booting up the system. See following steps.
Step 1
If you type the following command, you can see the swap is not being used:
cat /proc/swaps

Step 2
Please type the following command to check the location of swap:
fdisk -l
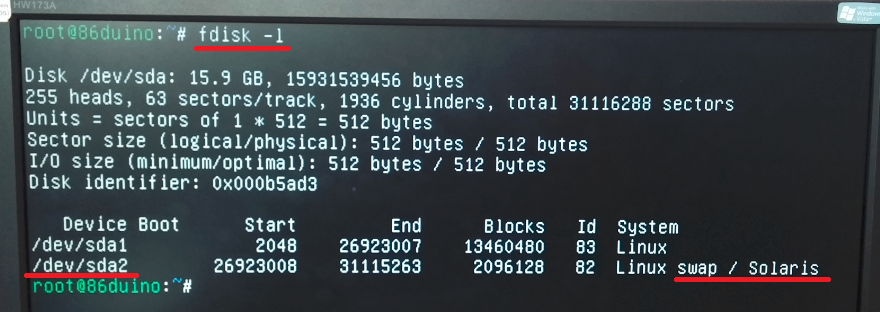
From the previous picture, you can see that the location for the swap is /dev/sda2.
Step 3
Please type the following command to open /etc/fstab:
vi /etc/fstab
![]()
Step 4
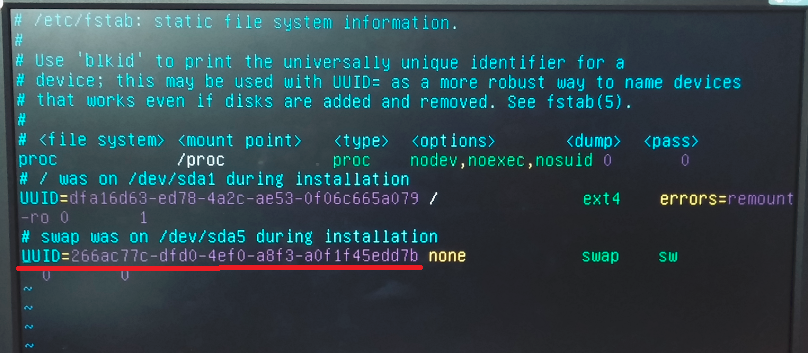
After opening /etc/fstab, find the last row and try to replace the word between “UUID” and “none” to /dev/sda2, like the following picture:
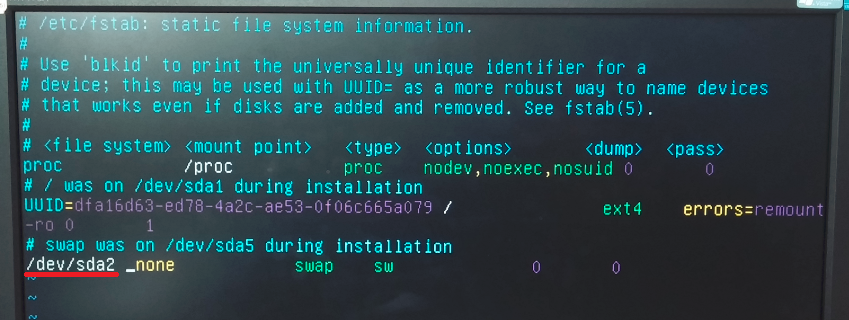
Step 5
Proceed to save the file and reboot the system with the following command:
reboot
![]()
Step 6
After rebooting the system, type the following commands to verify that the swap has been successfully changed been used for the system.
cat /proc/swaps

The text of the 86Duino reference is licensed under a Creative Commons Attribution-ShareAlike 3.0 License.