Link 86Duino to 86Scratch – Bluetooth
Bluetooth module HC-06
86Duino needs to use an additional Bluetooth module HC-06 to expand the Bluetooth connection function. Common Bluetooth modules on the market include HC-05 and HC-06. The appearance diagram of HC-06 is as follows:
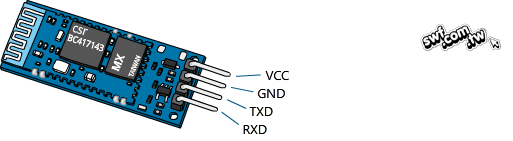
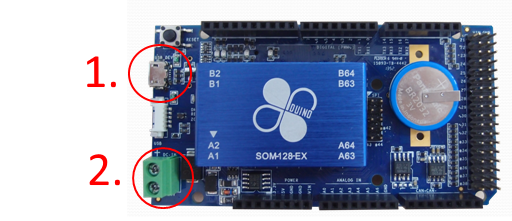
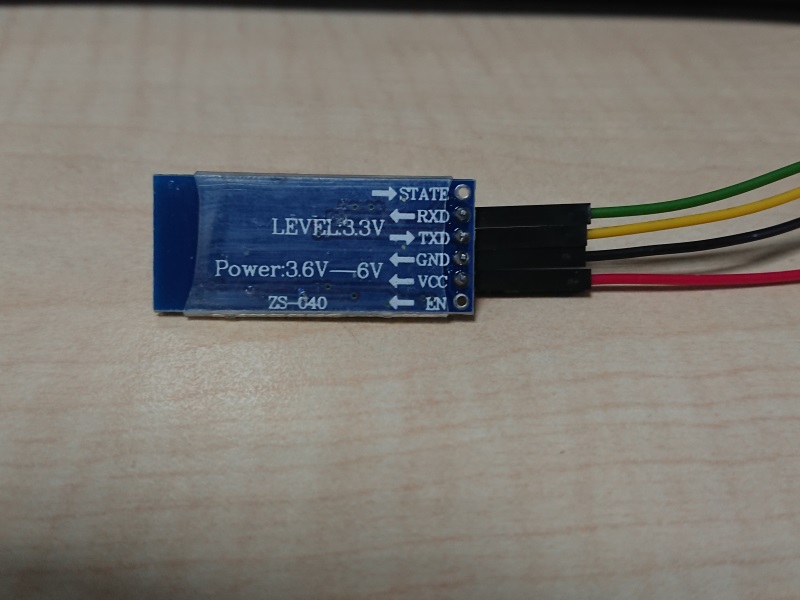
From the above picture, you can see that HC-06 has 4 external pins. 86Duino can connect HC-06 through 4 Dupont wires and 4 pin headers. Here is the Take 86Duino ONE as an example. First, make sure that the USB power supply and external power input interface of 86Duino ONE are not connected to power:
Prepare 4 2.54mm Dupont wires and 4 2.54 pin headers, and connect them as follows:
- 86Duino ONE's 5V is connected to HC-06's VCC (red wire in the picture)
- 86Duino ONE's GND is connected to HC-06's GND (black wire in the picture)
- 86Duino ONE's RX1 is connected to HC-06's TXD (yellow line in the picture)
- 86Duino ONE's TX1 connects to HC-06's RXD (green line in the picture)
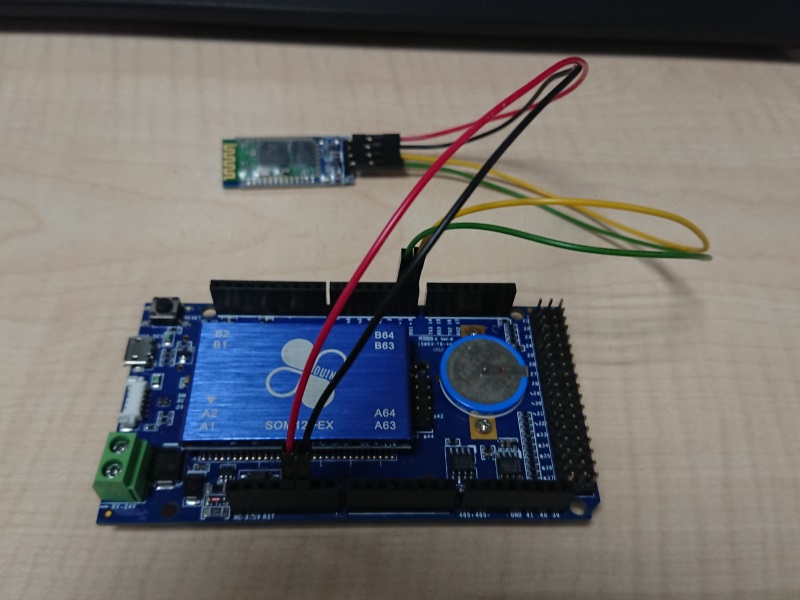
Insert the red DuPont wire into the 5V of 86Duino and the black DuPont wire into the GND of 86Duino:
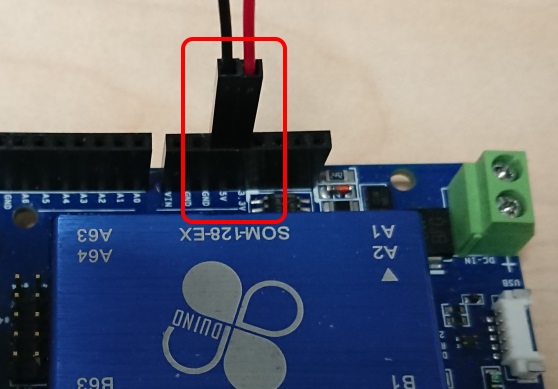
Insert the yellow Dupont cable into RX1 of 86Duino and the green Dupont cable into TX1 of 86Duino:

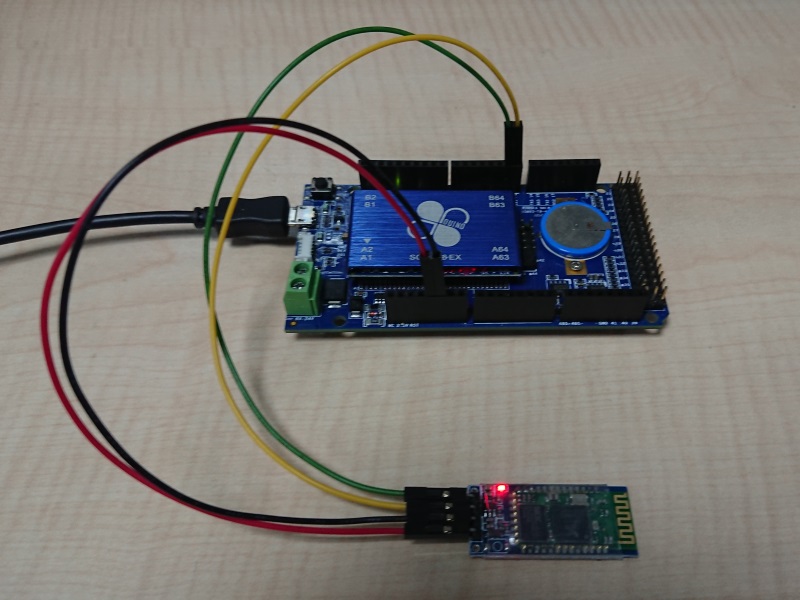
This completes the connection of the HC-06 module. Next, use a USB transmission cable to connect 86Duino ONE to your computer. After powering on, you can see the red LED on the HC-06 module start to flash. In this way, 86Duino ONE has the ability to connect to Bluetooth.
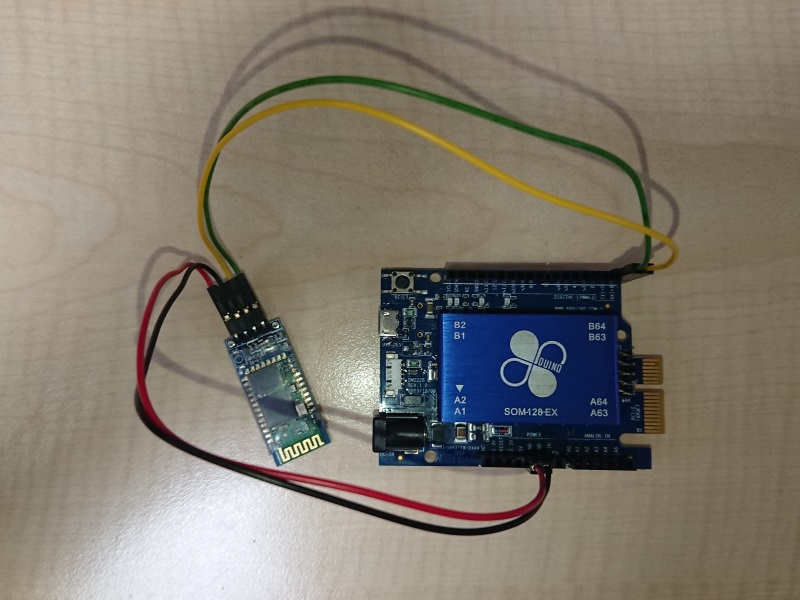
 If you replace 86Duino ONE with 86Duino ZERO or 86Duino EduCake, you can still connect HC-06 by following the above steps. The only difference is the position of the pins.
Adding Bluetooth devices to the computer
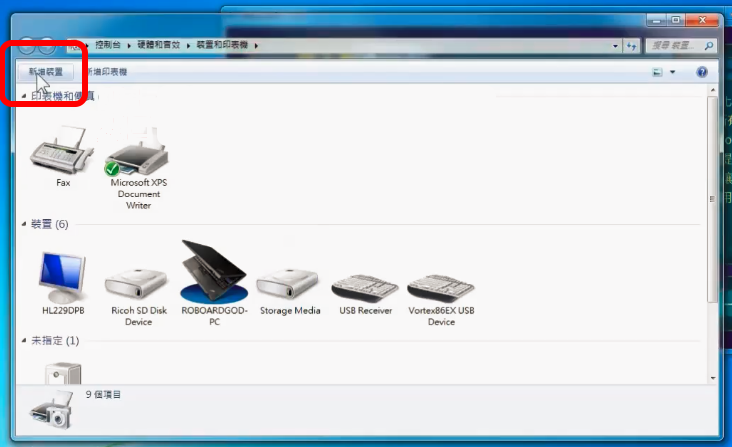
To connect 86Scratch to 86Duino via Bluetooth, your computer must first pair with 86Duino's HC-06. If your computer does not have a built-in Bluetooth connection function, you can use an external USB Bluetooth receiver and the manufacturer's APP to enable the Bluetooth function. After the Bluetooth function is enabled, you can add a Bluetooth device. (The following assumes that your computer already has a Bluetooth receiver) If your operating system is Windows 7, please follow the steps below to add a Bluetooth device: 1. Click Start -> Devices and Printers:
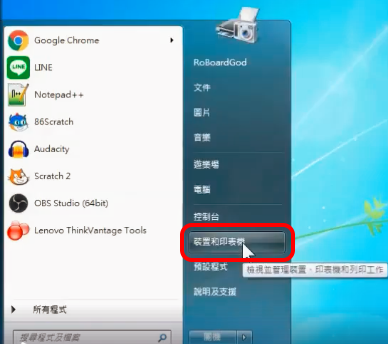
2. Click Add Device:
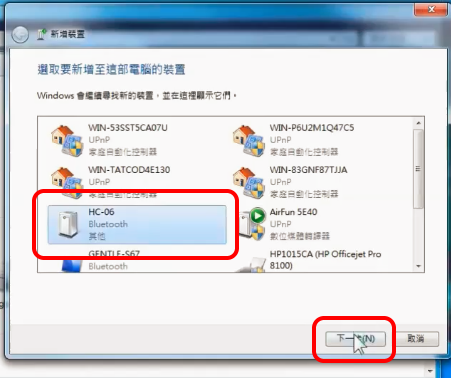
 3. After finding the HC-06 device, click Next:
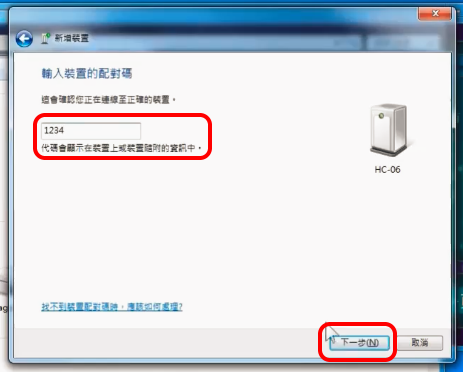
4. Click to enter the pairing code of the device:
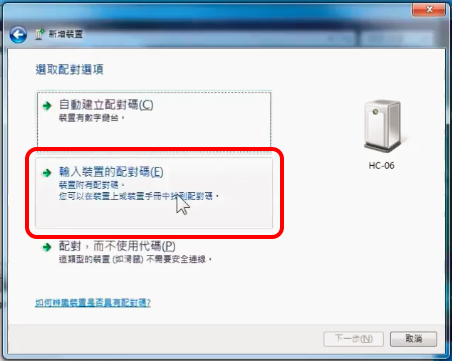
5. Enter the pairing code of HC-06 (the default is 1234) and click Next:
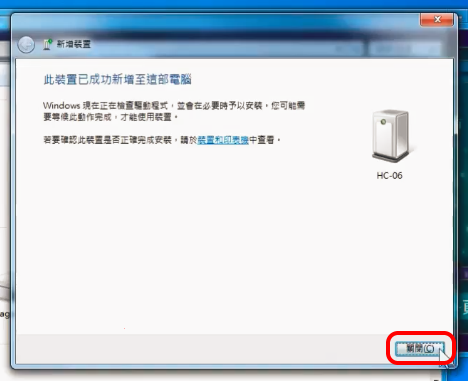
6. Click Close to complete the new device:
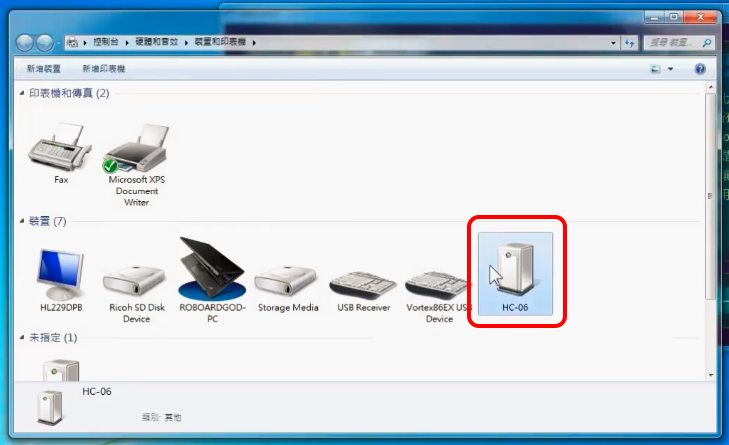
7. You can see that HC-06 has been added to the device list:
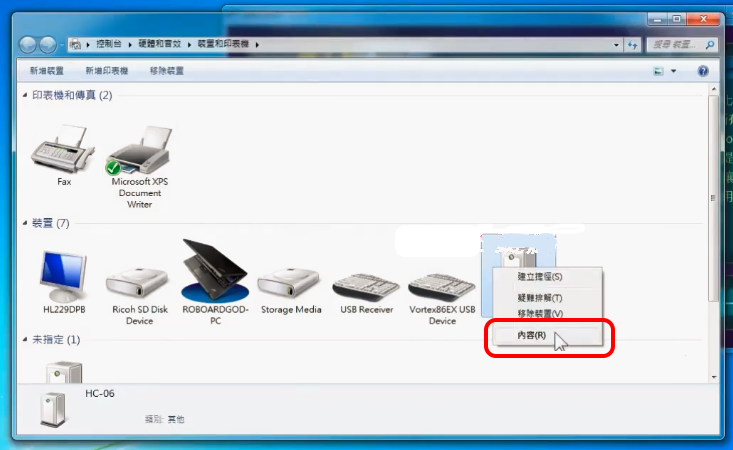
8. Use the right mouse button to click on HC-06 to open the function menu, and click "Content" in the menu:
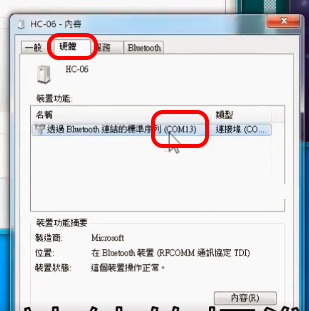
 9. After clicking on the "Hardware" column, you can see the HC-06 on our computer. COMPort number (COM13 in this case):
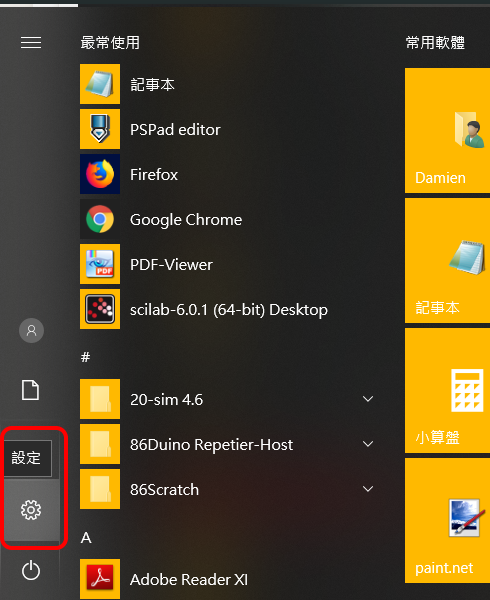
If your operating system is Windows 8/10, please follow the steps below to add a Bluetooth device: 1. Click Start -> Settings:
2. Click "Devices":

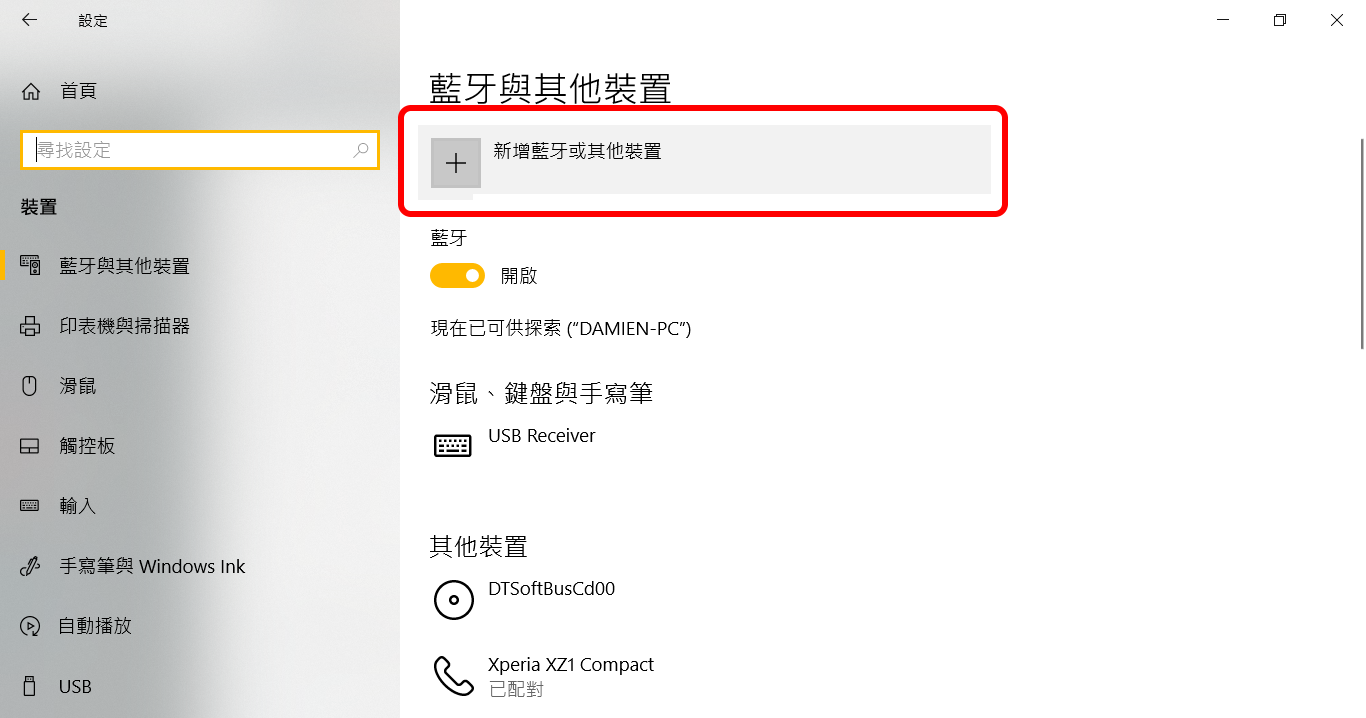
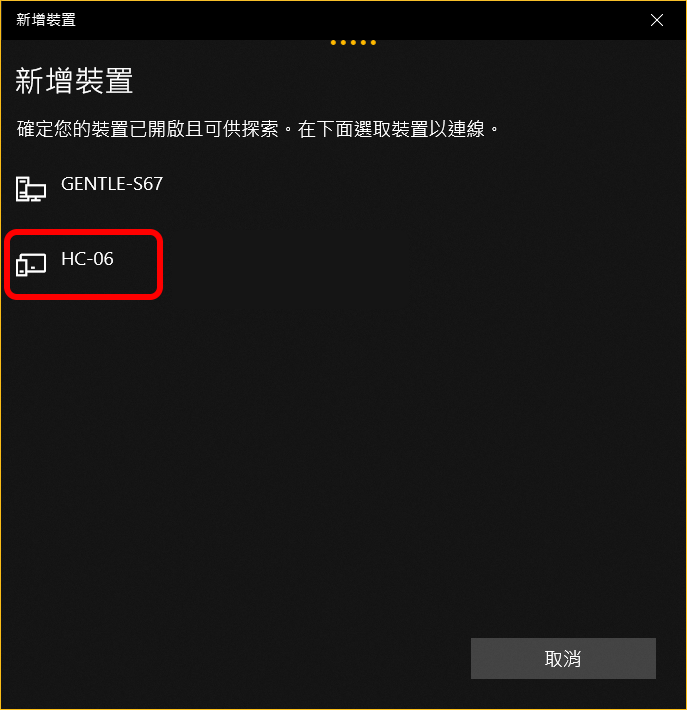
3. Click "Add Bluetooth or other device" :
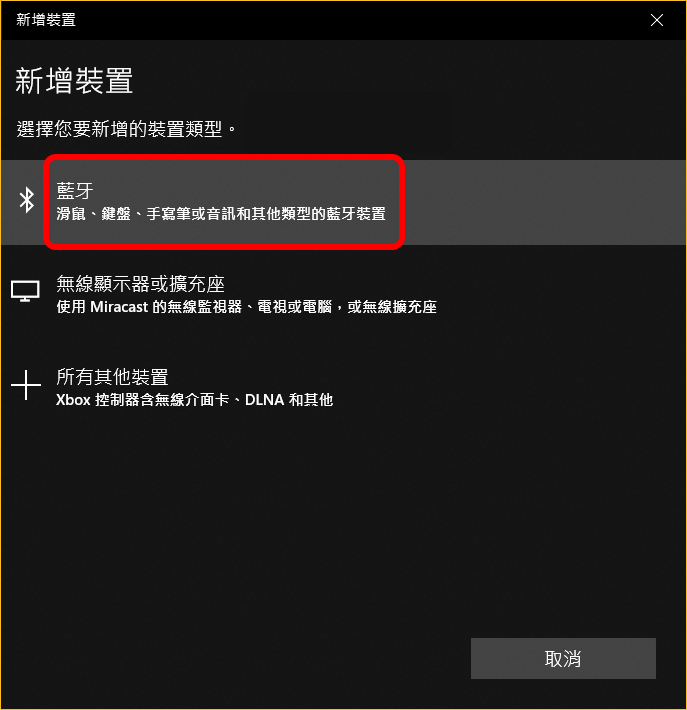
4. Click "Bluetooth" and select Add Bluetooth device :
5. You can see the Bluetooth devices detected by the computer in the list, please click HC-06 :
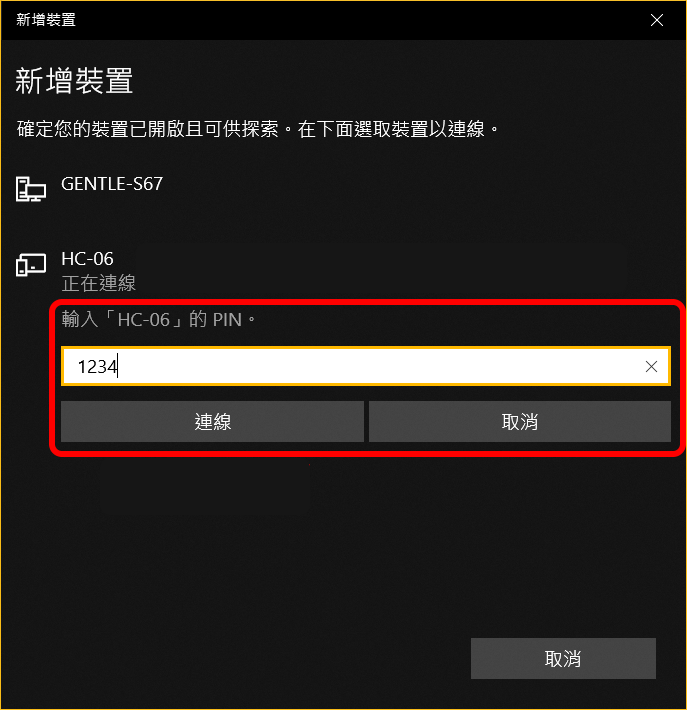
6. Enter the PIN code of HC-06 (the default is 1234) and click Connect:
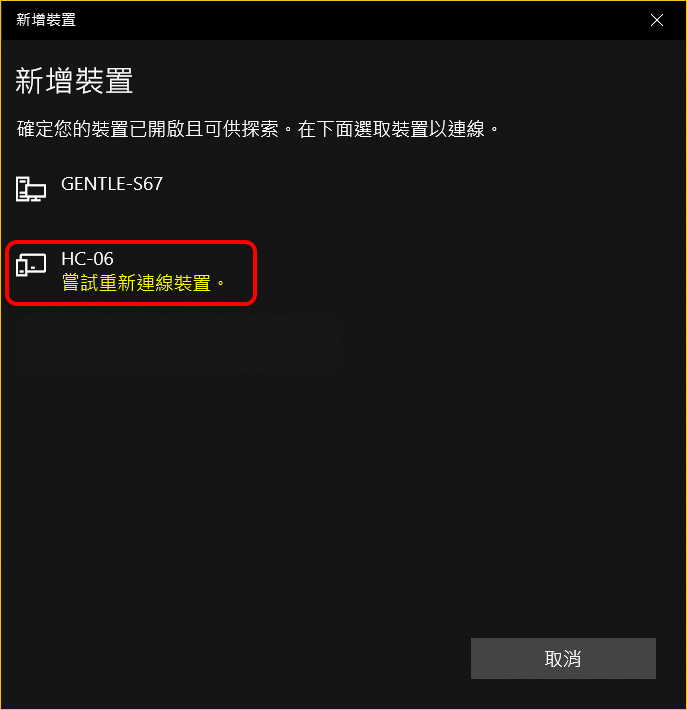
7. If the following screen appears after entering the PIN code, please click "HC-06" again and repeat step 6. Try to enter the PIN code again to connect to HC-06:
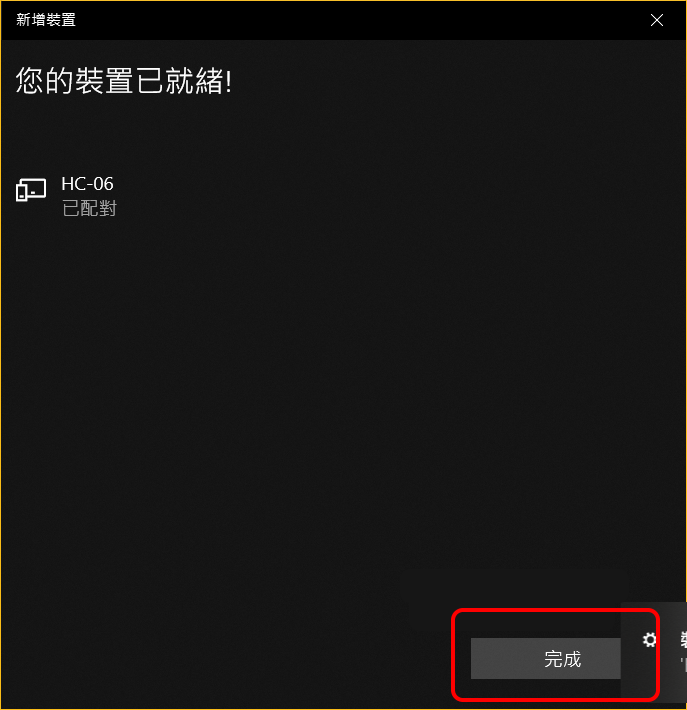
8. HC-06 is paired with the computer successfully, click Finish to close the window.
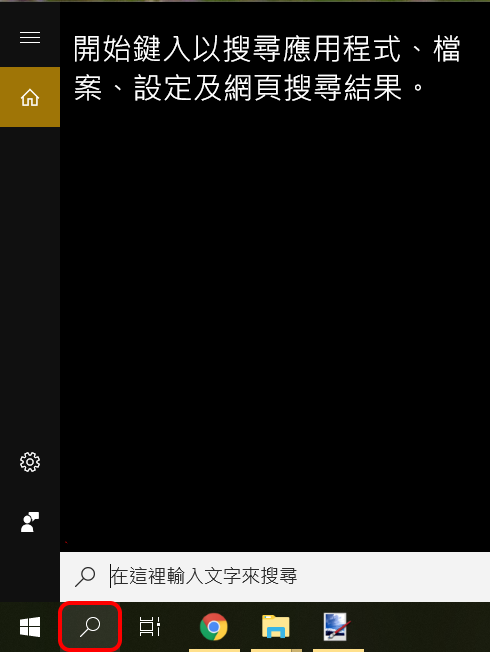
9. Next, we need to confirm the COMPort number of HC-06 on the computer. Please click the magnifying glass icon on the Windows taskbar:
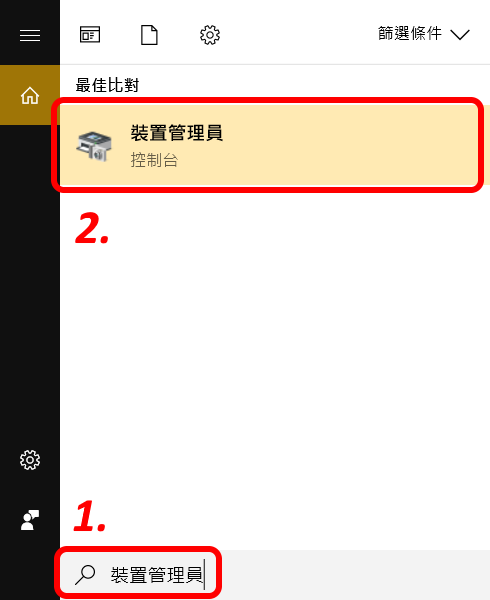
10. After entering "Device Manager", the system's device manager icon will appear in the blank space above. Click the icon to enter the device manager window:
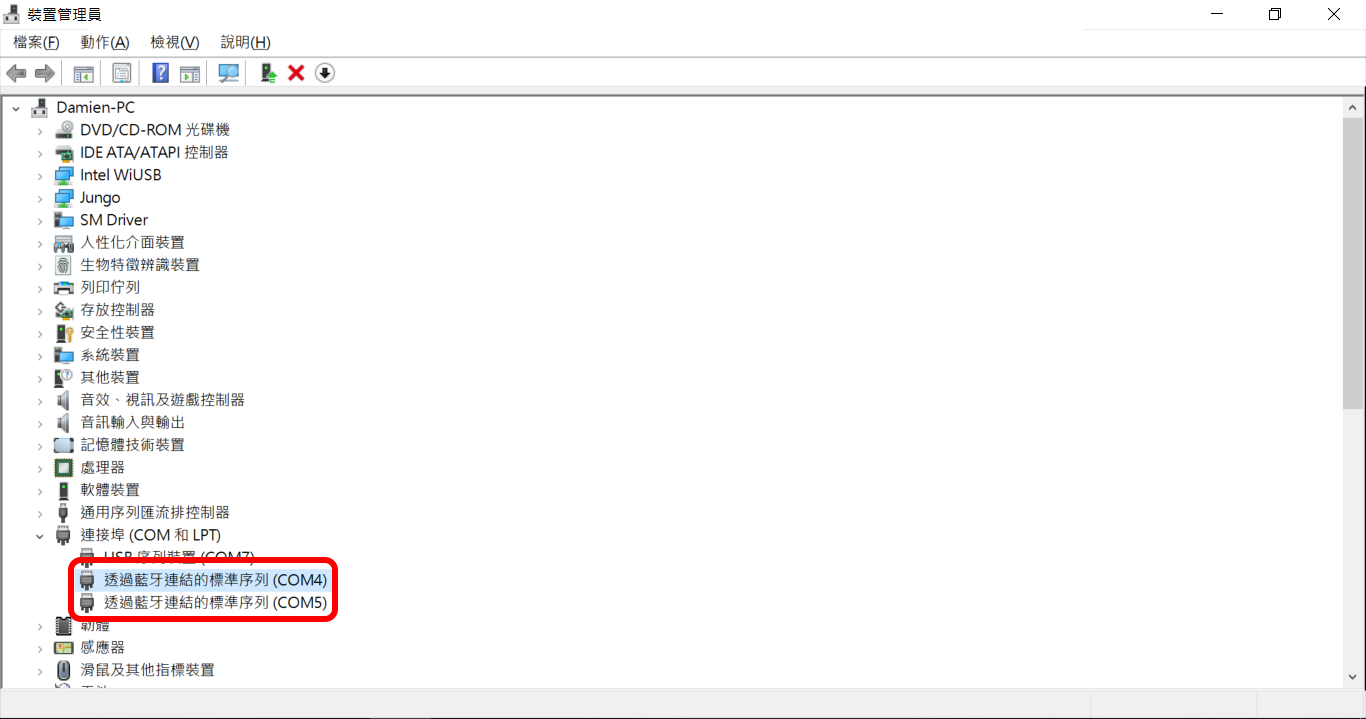
11. Although there are 2 ports displayed, there is actually only one that can be used (the one with the smaller COMPort number). When setting the port for the 86Scratch Bluetooth connection, please remember to select the port with the smaller number (COM4 in this example).
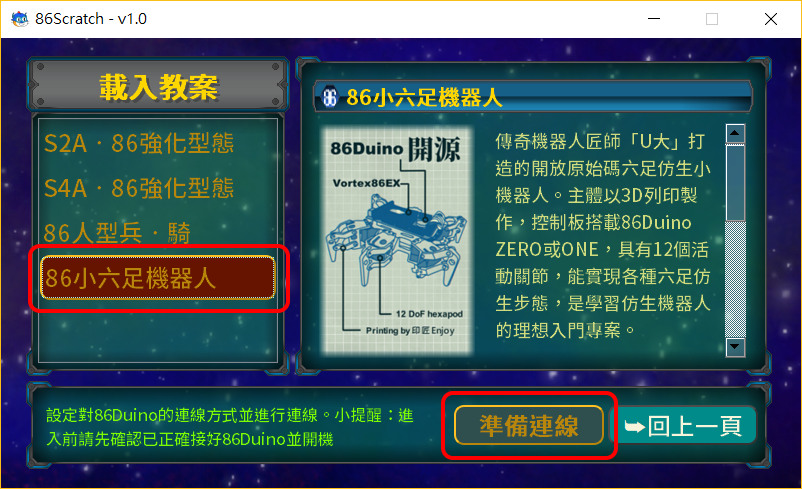
Load 86 Small Six-legged Robot Lesson Plan
After opening 86Scratch, please click "Load Lesson Plan" to enter the lesson plan selection screen:
Load 86 Small Six-legged Robot Lesson Plan
ent/uploads/2018/05/pic11.png" />
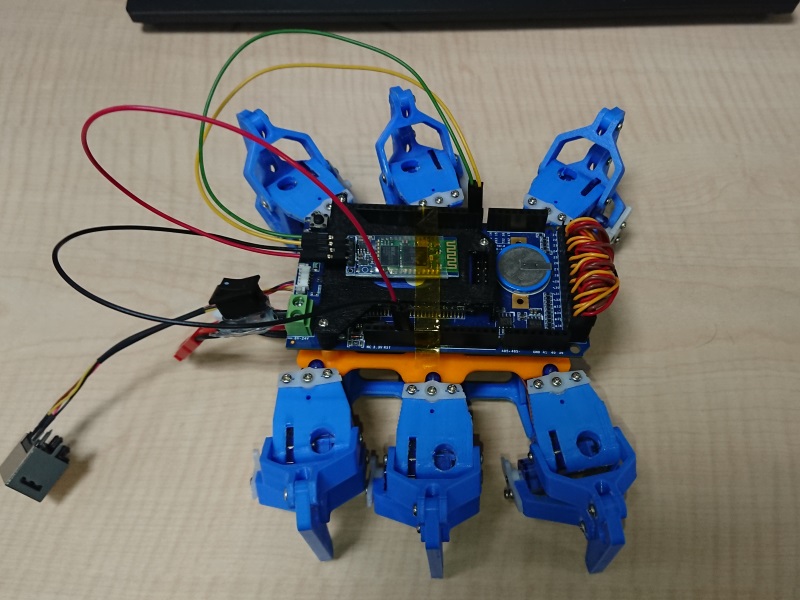
After gaining the ability to connect to Bluetooth, 86Duino ONE can finally get rid of the constraints of USB transmission lines and move freely. If it is transformed into a mobile vehicle, it can be remotely controlled wirelessly! When this idea came into being, the legendary craftsman U Da couldn't wait any longer and transformed 86Duino ONE into a hexapod robot that can move on the ground. Because of his exquisite craftsmanship, this 86 little hexapod has become a built-in teaching plan in 86Scratch:
To control the hexapod robot via Bluetooth, please select the "86 Small Hexapod Robot" lesson plan and then click "Prepare to Connect".
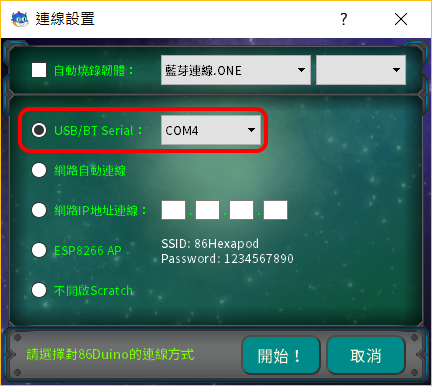
Set up Bluetooth Connection
After the connection settings window appears, please click the "USB/BT Serial" option. For the COMPort number, please refer to the HC-06 COMPort number we saw when we added a Bluetooth device earlier (this example is COM4) :
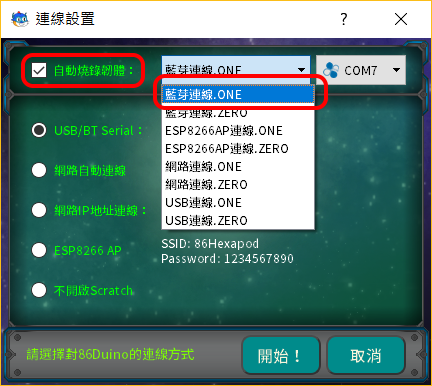
If the last time you connected to 86Duino was not via Bluetooth or this is the first time you connected to 86Duino, please check "Automatically burn firmware" and select the Bluetooth firmware for 86Duino ONE, then click "Start!" :
Before actually connecting, 86Scratch will first burn the firmware of 86Duino ONE to the Bluetooth version. :
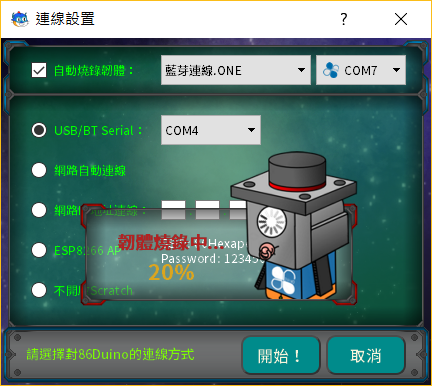
*Note: If you choose the same lesson plan next time, you don’t need to burn the firmware (uncheck it) and can connect directly.
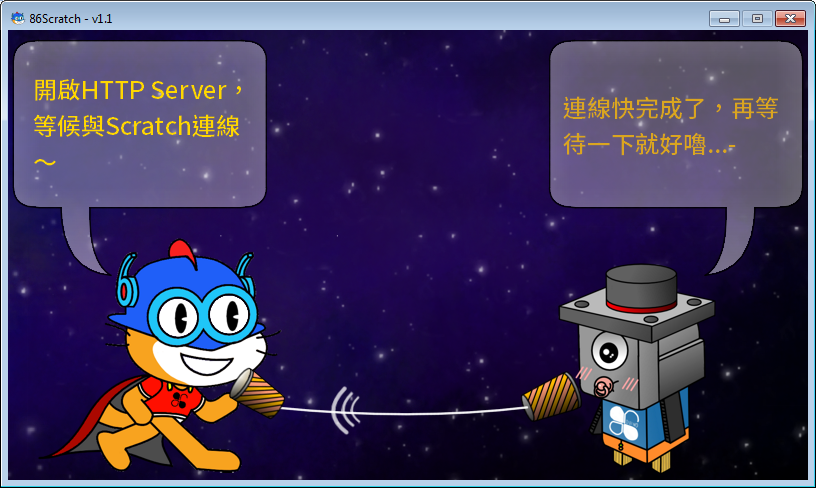
After the firmware is burned, 86Scratch will start to connect to 86Duino ONE via Bluetooth:
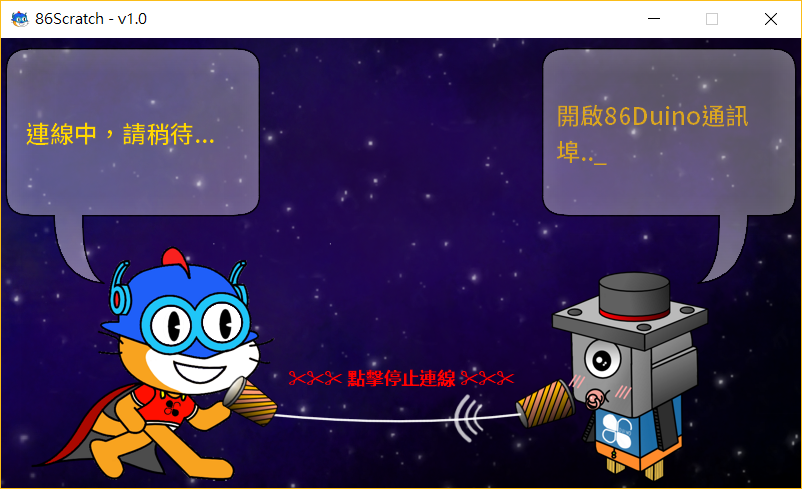
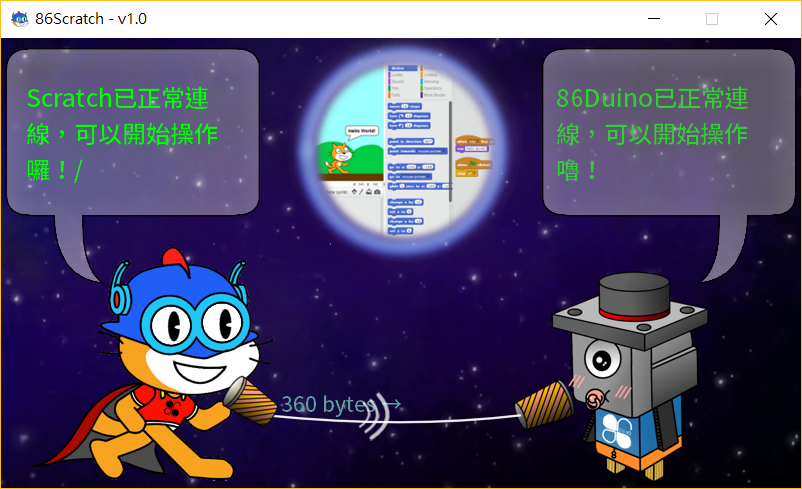
During the process, 86Scratch will try to connect to 86Duino. You can see the 86Scratch on the left side of the screen The cat and the 86 bacteria on the right are talking with a microphone. When you see the following dialogue screen, it means that the connection is almost successful:
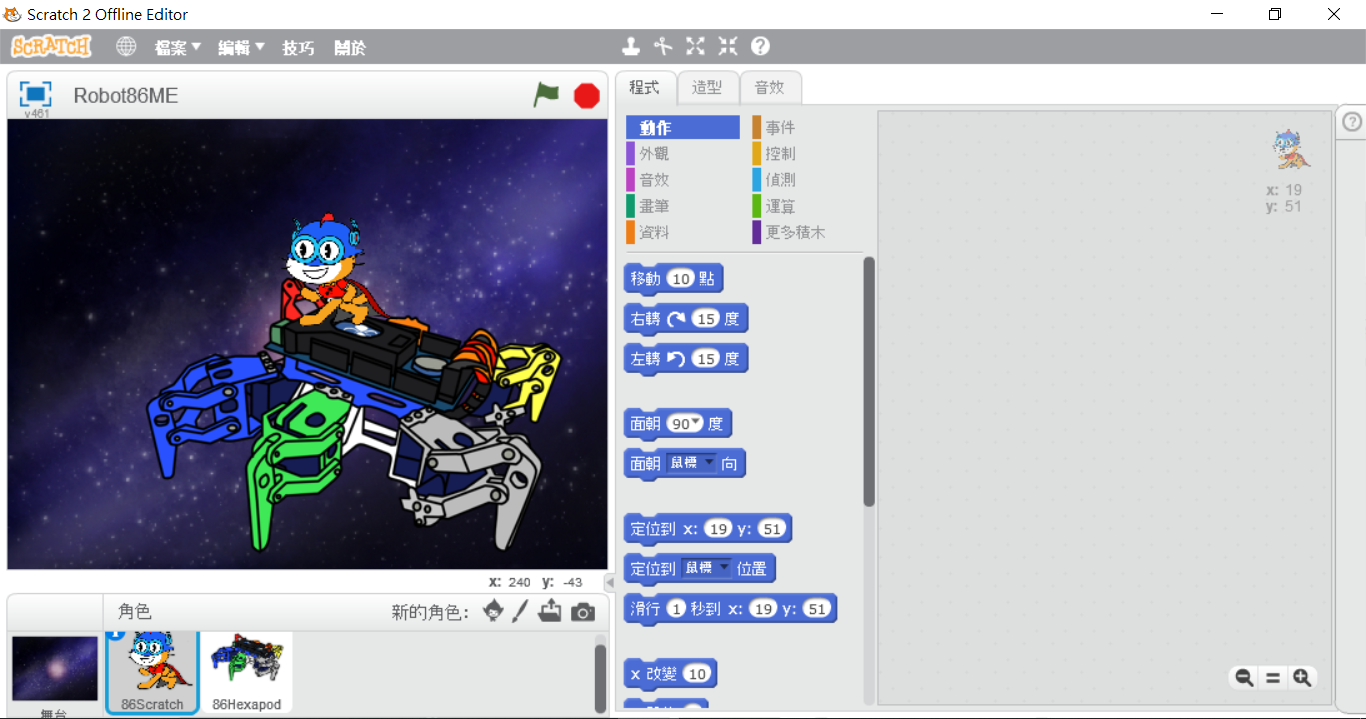
At this time, 86Scratch will automatically help us open Scratch 2.0 on the computer (and will also load the building blocks of the 86 small six-legged robot):
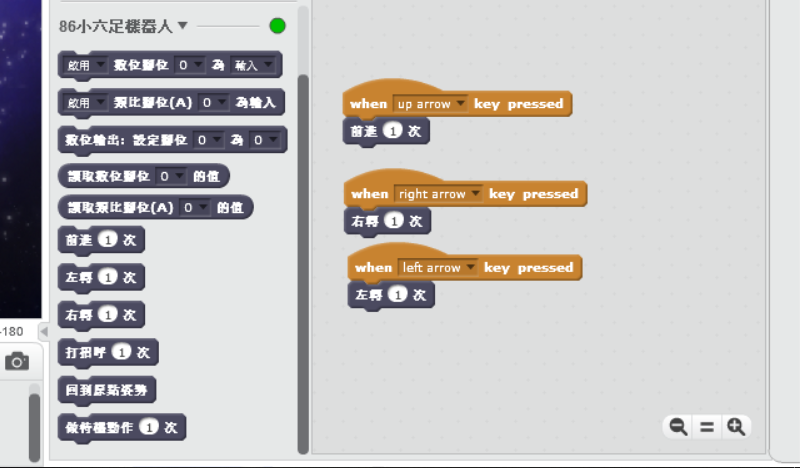
Click "More Building Blocks" to find the building blocks of the "86 small six-legged robot". There is a light next to the building block. The light is red in normal state. When After 86Scratch successfully connects the building blocks and 86Duino, the light will change from red to green:
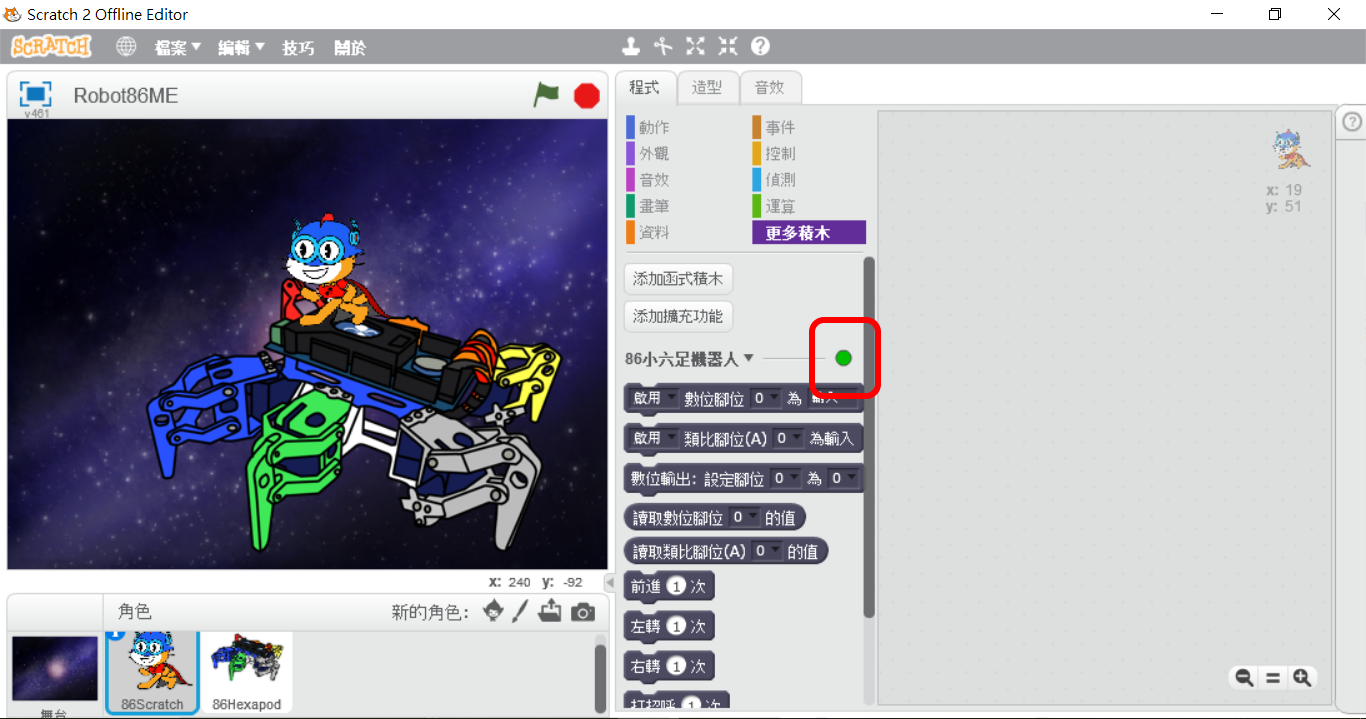
When the light turns green, switch back to the 86Scratch window and you will see the following screen:
Now the connection is successful, you can start controlling the 86 small six-legged robot!!
86Scratch control 86 Little Six-legged Robot
Try to use the expansion blocks of the 86 Little Six-legged Robot to make the 86 Little Six-legged Robot move!!
86Scratch Home
The text of the 86Duino reference material follows the Creative Commons Attribution-Share Alike 3.0 License. The code examples in the reference material have been released to the public domain.