86Scratch User Manual
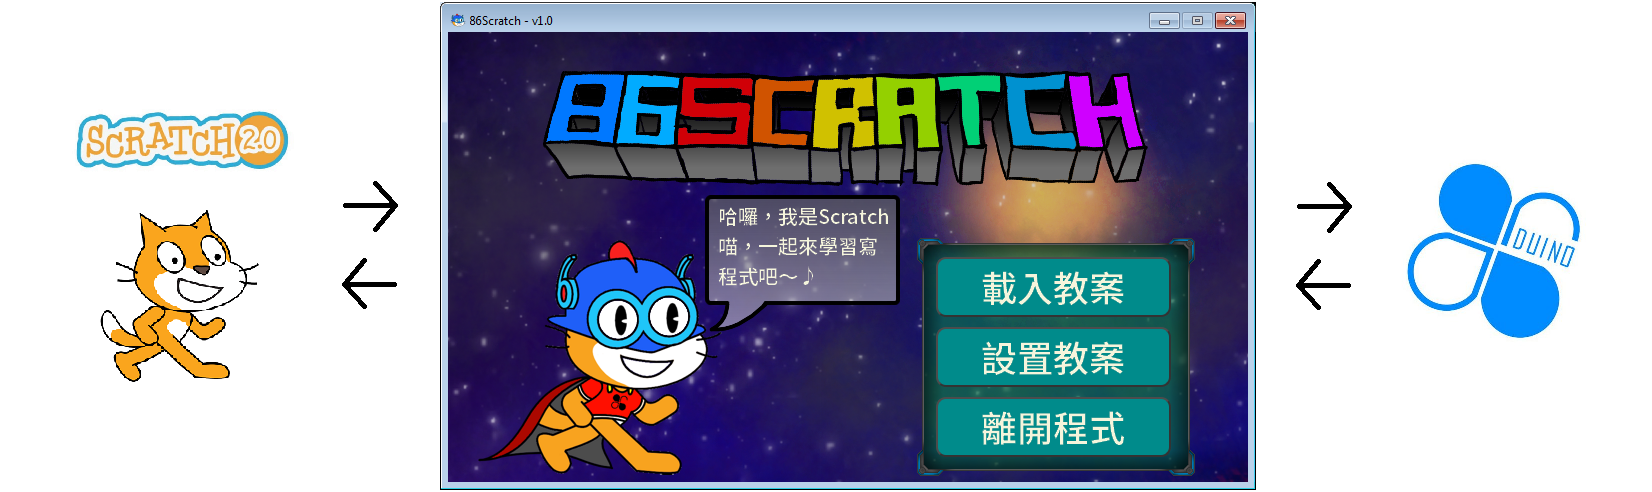
86Scratch is a software that connects Scratch 2.0 and 86Duino, allowing users to write programs to control 86Duino development boards and 86Duino-based robots by dragging blocks in Scratch 2.0.
86Scratch Development Process
Here describes the process of 86Scratch from scratch, and also introduces the developers and projects of the 86Duino team.
86Scratch download and installation method
Please select your operating system:
- Windows
- Linux (Coming soon…)
- Mac (Coming soon…)
86Scratch usage
-
Introduction to the operation process
86Scratch completely guides you with graphical screens, easily connecting 86Duino and Scratch 2.0 http://www.youtube.com/embed/QdQzyM3Uc8Y
-
Brief introduction to built-in lesson plans
From the above operation flow, we can see that after clicking "Load lesson plan" on the 86Scratch homepage, several lesson plans will appear on the left side of the screen.
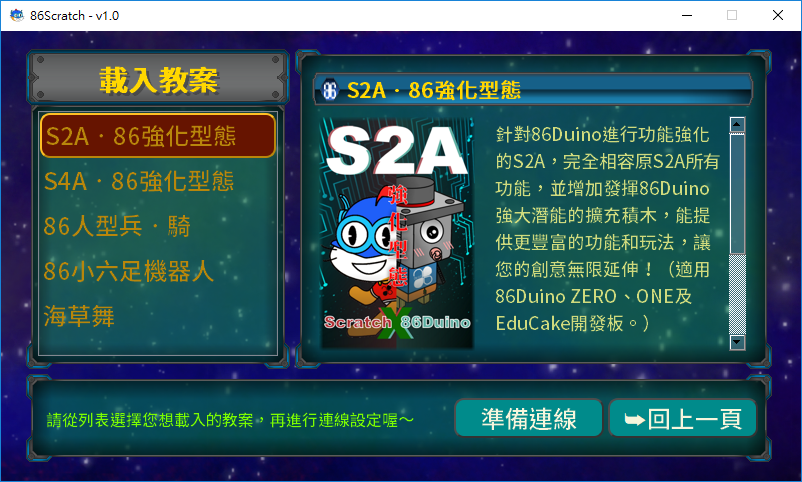
There are 4 built-in lesson plans, namely:
I. S2A‧86 Enhanced Form: Originally the building blocks provided by S2A, after being improved by the 86Duino team, the project was named "Enhanced Form", which means that in addition to the building blocks of S2A, 86Duino special building blocks are also added. In addition to allowing friends who are familiar with S2A building blocks to get started immediately, they can also experience the special features of 86Duino through the special building blocks. This project provides S2A blocks: control digital pins, read analog pins, adjust pitch, control servo motors, etc. 86Duino blocks: advanced servo motor control, read encoders, read inertial sensors, etc.
II. S4A‧86 Enhanced Form: Originally S4A blocks, after being improved by the 86Duino team, the project is called "enhanced form", which means that in addition to S4A blocks, 86Duino dedicated blocks are also added. In addition to allowing friends who are familiar with S4A blocks to get started immediately, they can also experience the special features of 86Duino through dedicated blocks. This project provides S4A blocks: control digital pins, read analog pins, adjust pitch, control servo motors, etc. 86Duino building blocks: read encoders, read inertial sensors, etc.
III. 86 Humanoid Soldier‧Cavalry: This is a robot project provided by the 86Duino team. This humanoid robot is made of a skeleton printed by a 3D printer and then assembled with 20 servo motors. Its movements are controlled by 86Duino AI. In the project, we can use building blocks to make the humanoid robot do: forward, turn left, turn right, salute, etc.
IV. 86 Small Six-legged Robot: This is also a robot project provided by the 86Duino team. This six-legged robot is made of a skeleton printed by a 3D printer and then assembled with 12 servo motors. Its movements are controlled by 86Duino Zero/One. In the project, we can use building blocks to make the six-legged robot do: move forward, turn left, turn right, say hello, etc. Note: You can find the above building blocks in "More Building Blocks" after opening Scratch 2.0 in 86Scratch.
-
How to connect 86Duino
After selecting the lesson plan, press the "Ready to connect" button, and a "Connection Settings" screen will pop up, where you can select the desired connection method:
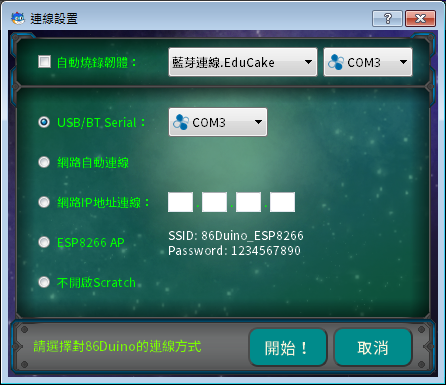
There are 4 types in total. Please click the following tutorial according to the connection method you want to use:
- USB Serial connection – The most common wired connection method
- Bluetooth connection – Low-cost wireless remote control method
- LAN connection – A wired remote control connection method
- ESP8266 AP connection – Another low-cost wireless remote control method
Error message comparison table
While 86Scratch is running, many check events are also being performed behind the scenes. From not yet connected to the connection completed, there will be dozens of correctness checks in the middle, such as whether our operation is reasonable, Scratch 2.0 and 86Duino Are there any problems with the interaction between the two, etc. Some checks are one-time, and some checks are periodic. Of course, these checks are performed in the background, and we usually don't notice them. Unless an error really occurs, the program will interrupt the process and remind us. With these checks, the 86Scratch program has a certain stability and helps us understand the cause of the error. Before we connect the 86Duino, the cause of the error is usually simple. 86Scratch will only pop up a dialog box to remind you (for example: Scratch 2.0 is not installed, 86Duino is not connected to the computer, etc.), and it can be executed normally after the problem is eliminated. When we continue to press "Start Connection" to enter the connection screen, the cause of the error will be much more complicated. 86Scratch uses the dialogue between 86Scratch Cat and 86 Bacteria to reflect the error. At this time, the line used by the two characters to communicate will also break and fall. Let's take a look at the causes of these errors and how to eliminate them. 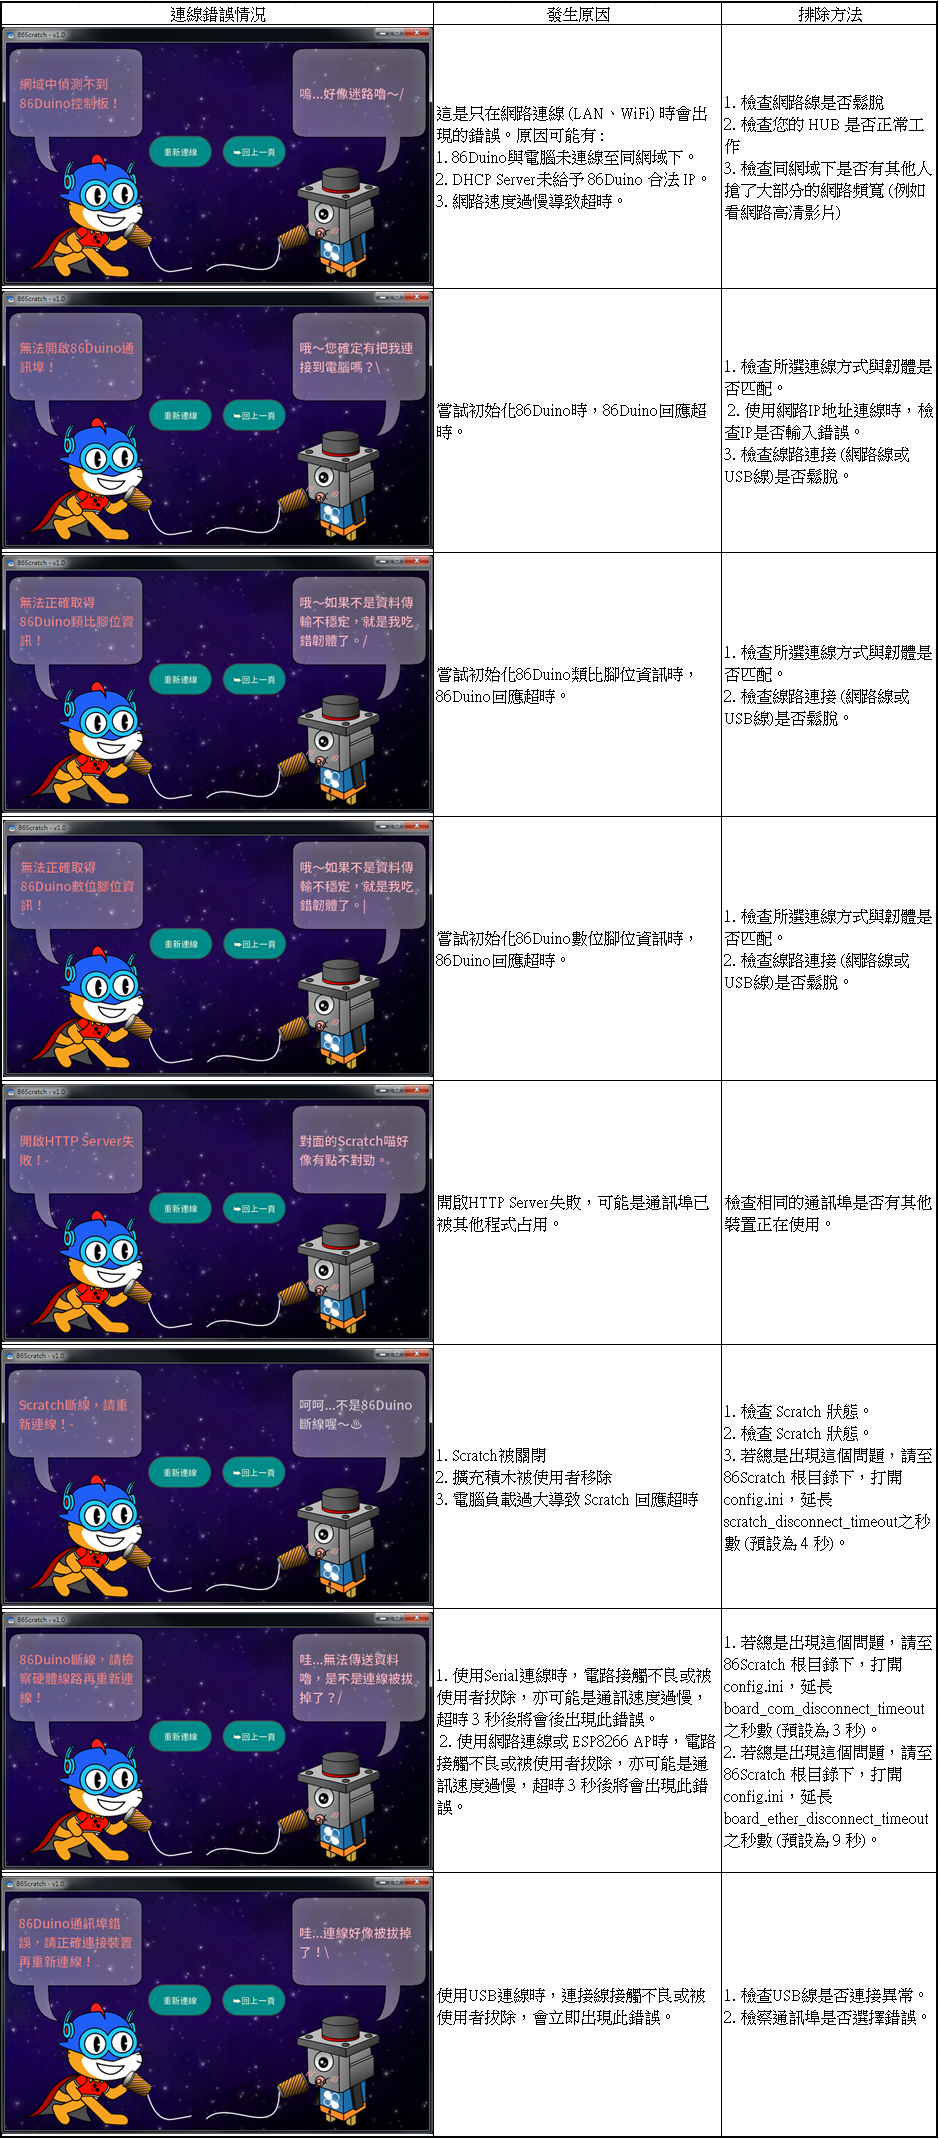
86Scratch fun teaching video for school
http://www.youtube.com/embed/qI_LCIUyeoU
http://www.youtube.com/embed/wMMe6MGaudY
http://www.youtube.com/embed/FlmpmyzbQ0o
STEM Education Home
86Duino Reference Materials follow the Creative Commons Attribution – Share Alike 3.0 License. The code examples in the references have been released into the public domain.