86Duino SysImage User Guide
After 86Duino SysImage is installed on a MicroSD storage card, you can use the MicroSD to launch 86Duino firmware on 86Duino hardware, which include the SysImage sketch. With SysImage, you can perform the following:
- Update 86Duino firmware stored on the built-in flash, including the bootloader
- Update 86Duino system BIOS
When SysImage is launched, the LED on 86Duino hardware flashes 3 short pulses follow by 2 long pulses to indicate it has been launched. You can create a new sketch and deploy the sketch onto the MicroSD and overwritten SysImage.
The following SysImage tutorials are covered in this application note:
- Setting up and using SysImage
- Updating the Bootloader
- Updating system BIOS
- Updating 86Duino firmware
- Setting 86Duino CPU clock
Setting up and using SysImage
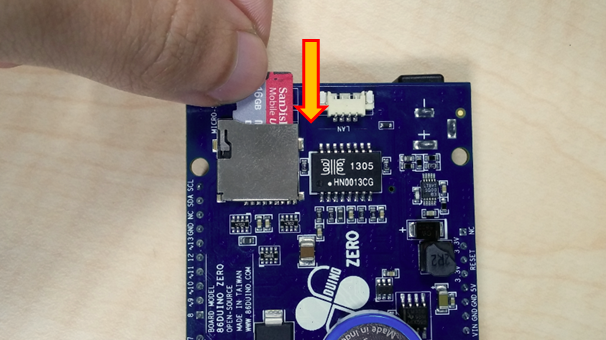
After installing 86Duino SysImage on a MicroSD storage card, you can use the MicroSD card as the bootable storage for an 86Duino board. Insert the MicroSD card as shown below:
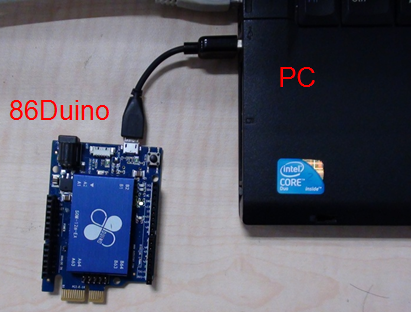
Attach the 86Duino board to the development PC as shown below:
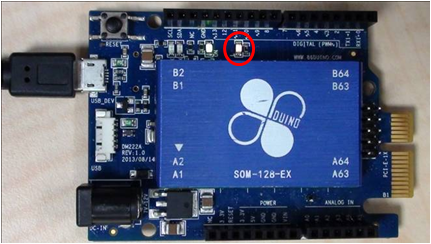
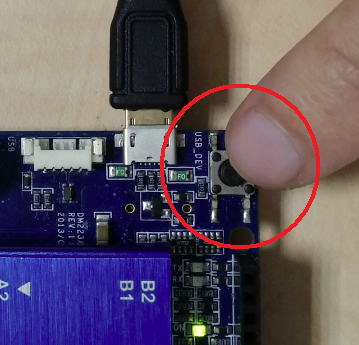
When SysImage is launched, the LED on the 86Duino board (as shown in the red-circle in the photo below) flashes 3 short pulses follow by 2 long pulses.
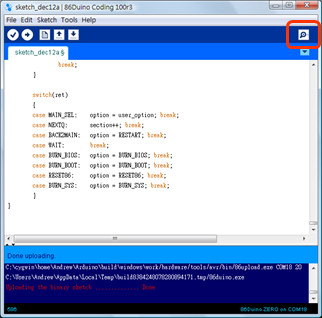
Next, launch the 86Duino development IDE and click on the icon on the top right menu to launch “Serial monitor”, as shown below.
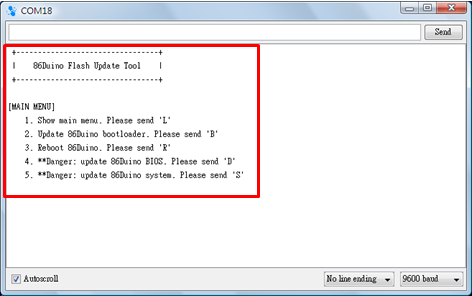
From the Serial monitor screen, you can see the SysImage menu, as shown below:
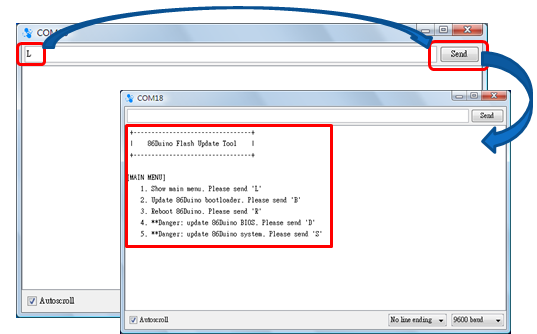
If SysImage menu is not shown, from the Serial monitor screen, enter “L” and click the Send button to launch SysImage menu, as shown below.
Using SysImage to update the built-in flash’s Bootloader
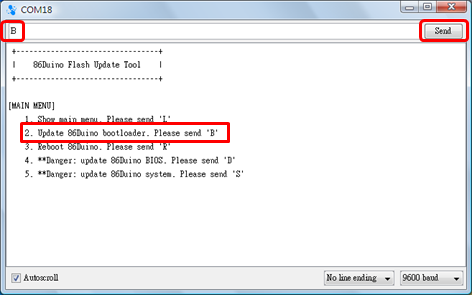
From the Serial monitor screen, with SysImage menu showing, enter ‘B’ and click the Send button, as shown below.
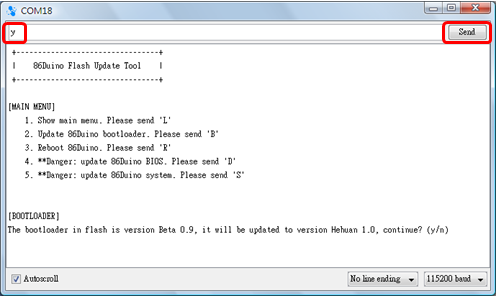
The Serial monitor shows information for the current bootloader on the built-in flash and asking you whether to continue.
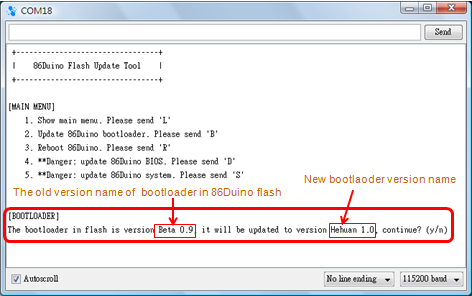
Enter yand click the Send button to continue, as shown below.
SysImage display another message to warn the bootloader is about to be updated, do not unplug the USB cable, do not remove power and do not press any button on the 86Duino board to avoid problem, as shown below.
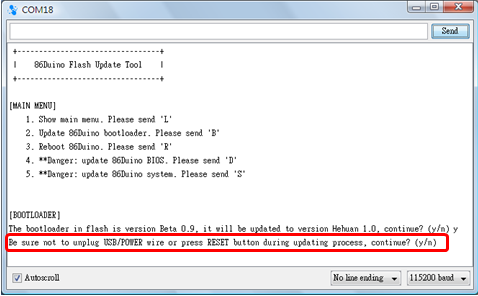
Enter y and click the Send button to continue, as shown below.
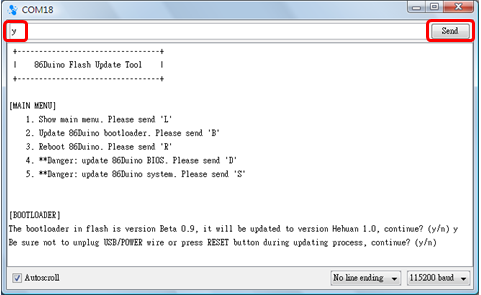
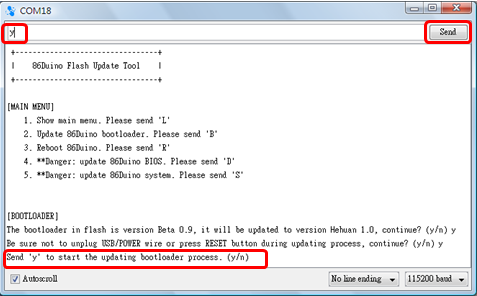
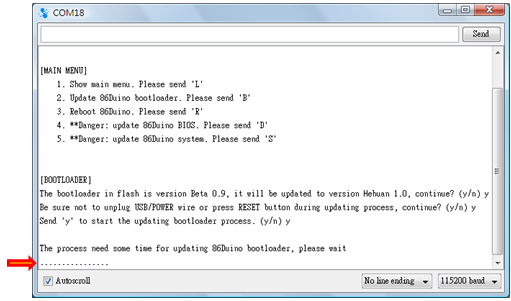
Enter y one more time and click the Send button to start the process to update 86Duino bootloader, as shown below.
(Note: The 3 repeated confirmations are purposely added to prevent un-intended update.)
While updating the bootloader, the Serial monitor displays a series of dot (. ) to indicate the progress, as shown below.
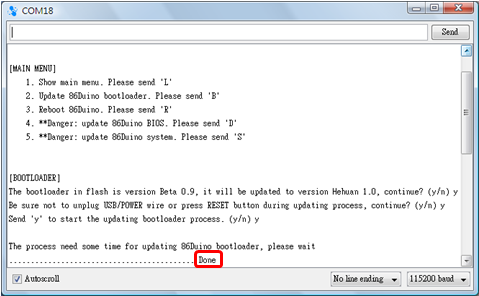
It takes approximately 15 to 20 seconds to update the bootloader. When completed, the Serial monitor display the message Done , as shown below.
Then, it displays information about the new bootloader, including version number, which indicates the process is SUCCESS , as shown below.
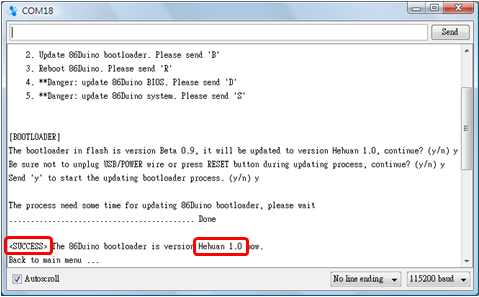
After the bootloader is updated, it returns to the main menu.

Next, you can enter another command or terminate Serial monitor to exit the current session.
Using SysImage to update 86Duino BIOS
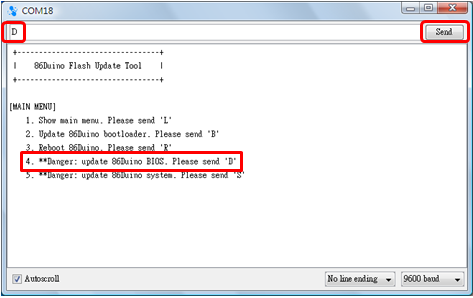
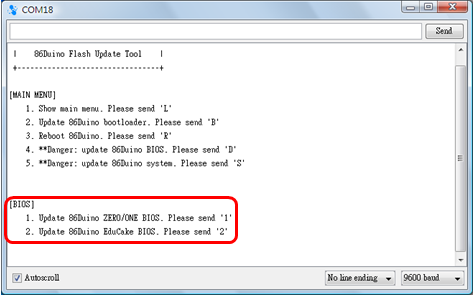
From the main menu, enter ‘D’ and click the Send button, as shown below.
From the 86Duino Flash Update Tool menu, select the board you are working with.
- Enter ‘
1‘ and click the Send button to select the 86Duino-Zero or 86Duino-One board. - Enter ‘
2‘ and click Send the Send button to select the EduCake.
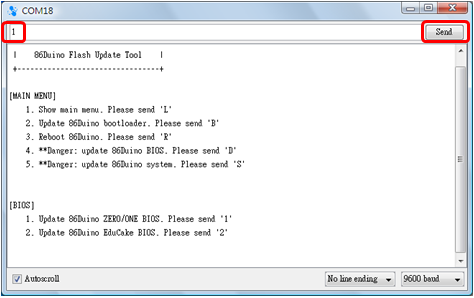
The 86Duino-Zero board is used for this tutorial. Enter ‘1’ and click the Send button to select this board.
Serial monitor shows the current installed 86Duino BIOS along with the version number, and ask for confirmation to continue, as shown below.
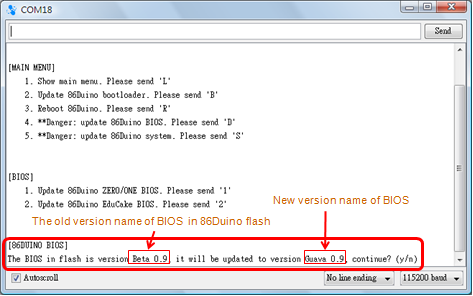
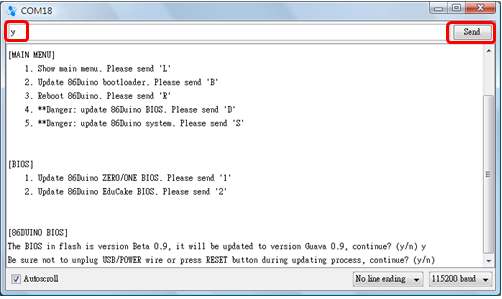
Enter ‘y’ and click the Send button to confirm and continue.

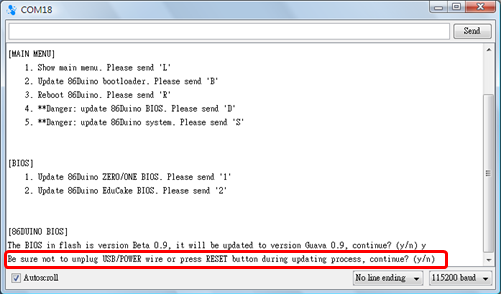
At this point, SysImage display a warning message to remind you not to remove power from the board and avoid pressing the RESET button during the BIOS update process to prevent problem, which can corrupt the BIOS and render the board not able to function.
SysImage ask for confirmation to continue the BIOS update process, as shown below.
*** Note: Upon a failed BIOS update which corrupted the internal BIOS, the 86Duino board will no longer function and need to be sent back to the factory for repair.
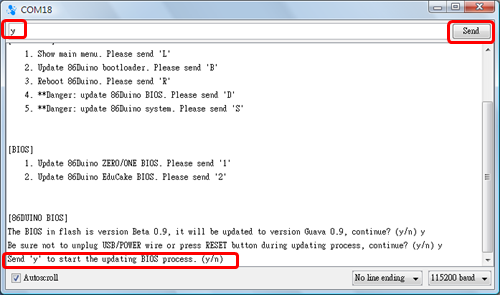
Enter ‘y’ and click on the Send button to confirm and continue.
SysImage ask for confirmation to continue the BIOS update process, one more time.
Enter ‘y’ and click the Send button to confirm and continue the BIOS update process.
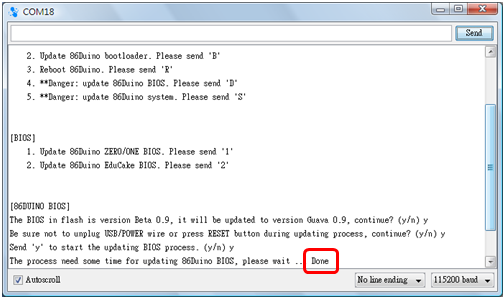
While the 86Duino BIOS is being updated, Serial monitor does not show any progress information. It takes 5 to 6 seconds to update the BIOS. Do not remove power and do not press the RESET button while the BIOS is being updated.
Serial monitor displays ‘Done’ when the BIOS update process is completed, as shown below.
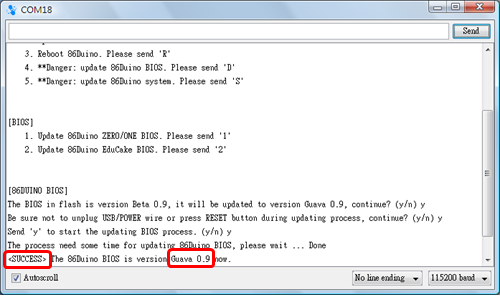
After BIOS is updated, serial monitor screen displays version information for the newly updated BIOS, and indicate the process is SUCCESS , as shown below.
Next, the 86Duino board will auto reset after a 5 seconds count down.
Prior to the 5 seconds count down is completed, terminate and re-launch the Serial monitor. After Serial monitor launch, you can see the SysImage main menu.
If the Serial monitor terminates after the 5 seconds count down is completed, you need to RESET the 86Duino board and then launch Serial monitor to see the main menu.
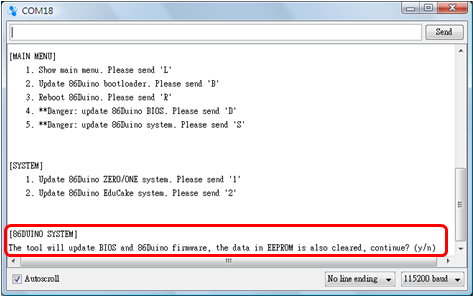
Using SysImage to update internal Flash and 86Duino system firmware
This process update the bootloader, system BIOS and re-initialize the CMOS and EEPROM settings.
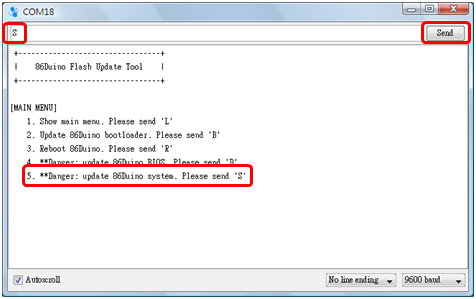
From the main menu, enter ‘S’ and click the Send button to continue.
Select the 86Duino board you are working with.
- Enter ‘
1’ and click the Send button to select the 86Duino-Zero or 86Duino-One board. - Enter ‘
2’ and click Send the Send button to select the EduCake.
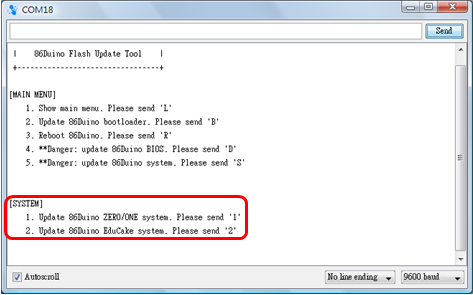
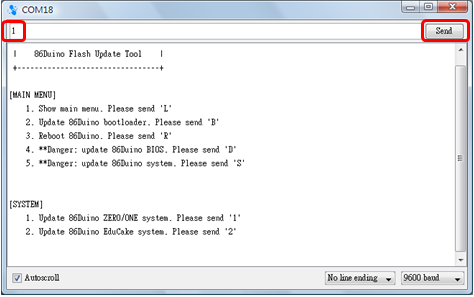
The 86Duino-Zero board is used for this tutorial. Enter ‘1’ and click the Send button to select this board.
As shown below, this process will update the following:
- BIOS
- 86Duino system firmware on the internal flash, which include bootloader, firmware, and etc.
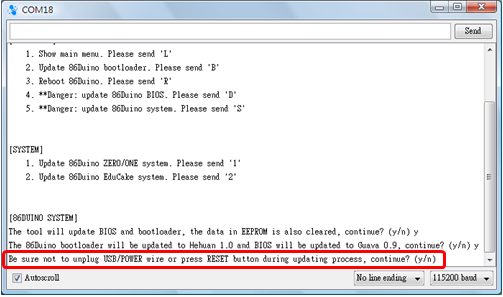
Note: Any content placed in the EEPROM will be deleted during the update process.
Enter ‘y’ and click the Send button to continue.
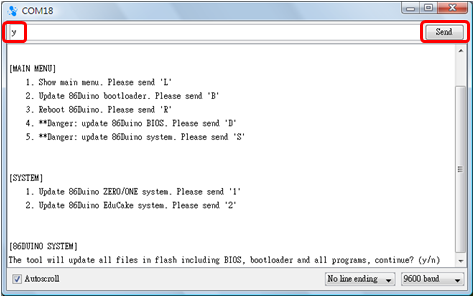
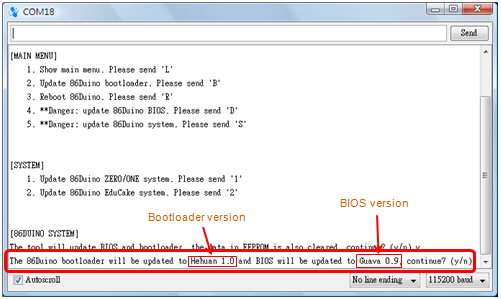
Serial monitor displays message to indicate the bootloader and BIOS to be updated, as shown below.
Enter ‘y’ and click the Send button to continue.
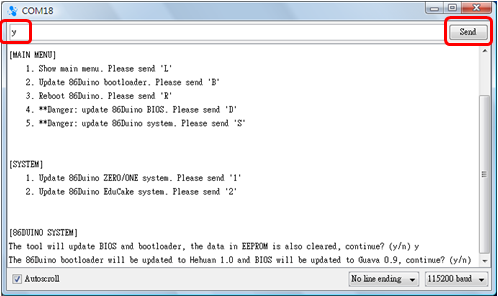
SysImage display a warning message to remind you not to remove power from the board and avoid pressing the RESET button during the update process to prevent problem.
*** Note: Upon a failed attempt to update the system flash, the 86Duino board will no longer function and need to be sent back to the factory for repair.
Enter ‘y’ and click the Send button to continue.

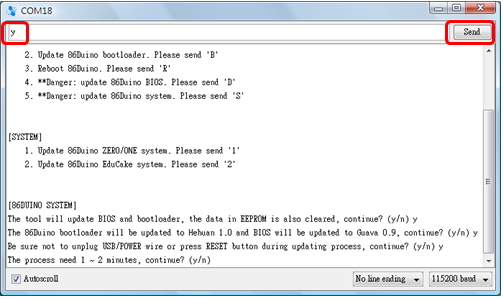
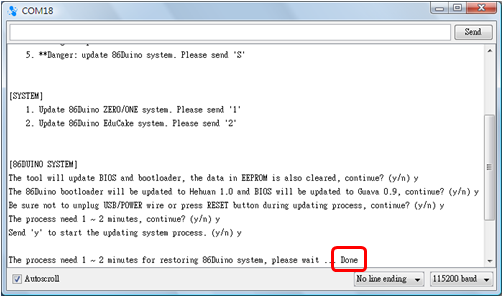
At this point, SysImage displays a message indicating the update process will take 1 to 2 minutes and ask for confirmation to continue.

Enter ‘y’ and click the Send button to confirm and continue.
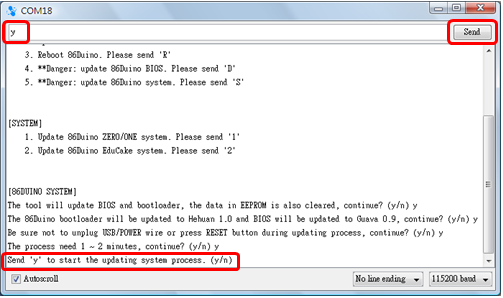
Enter ‘y’ and click the Send button, one more time, to confirm and continue.
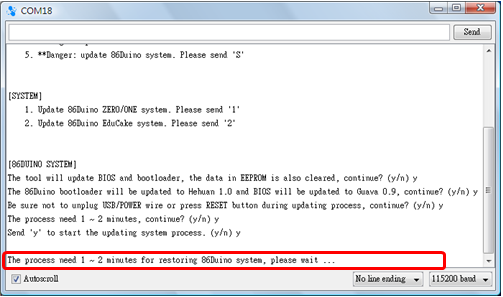
During the update process, SysImage does not provides other information during the update process, which will take approximately 1 to 2 minutes.
***Note: While the internal flash is being updated, do not remove power and do not press the RESET button to avoid problem.
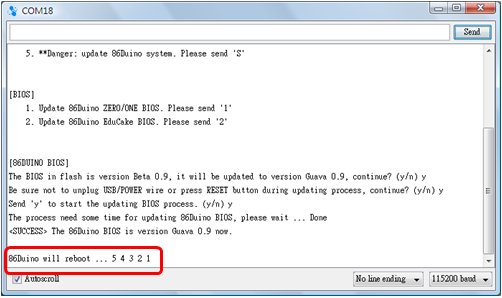
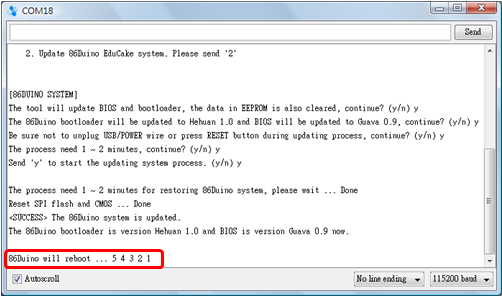
When SysImage displays the message ‘Done’, it moves on to the 1st step to update the CMOS.
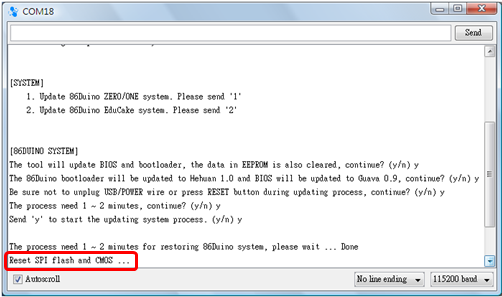
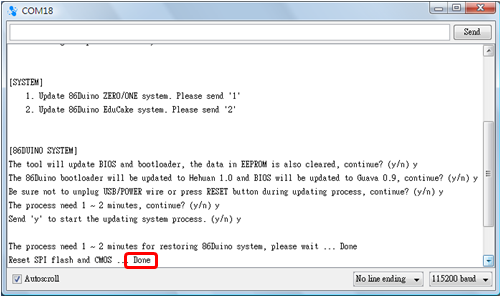
When the message ‘Done’ is shown, it indicates the 2nd step, updating the CMOS, is completed.
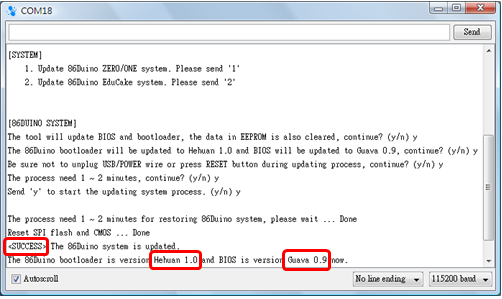
In the last step, SysImage displays the ‘SUCCESS ’ message and shows the updated bootloader and BIOS information, which indicates the 86Duino internal flash update is completed.
Next, the 86Duino board will auto reset after a 5 seconds count down.
Prior to the 5 seconds count down is completed, terminate and re-launch the Serial monitor. After Serial monitor launch, you can see the SysImage main menu.
If the Serial monitor terminates after the 5 seconds count down is completed, you need to RESET the 86Duino board and then launch Serial monitor to see the main menu.
Using SysImage to set 86Duino CPU clock
You can adjust 86Duino CPU to 200MHz or 300MHz (default).
From the main menu, enter A and click the Send button to continue.
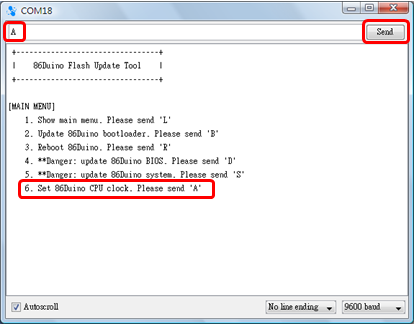
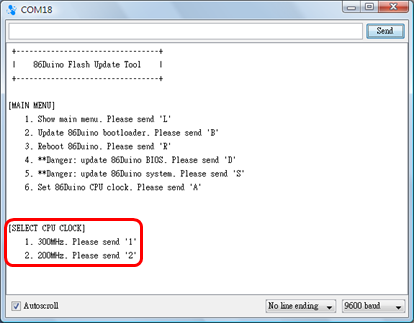
Select a 86Duino clock:
- Enter
1and click the Send button to select 300MHz - Enter
2and click the Send button to select 200MHz - Remarks: There is a hidden option here to overclock your 86Duino; you could use it at your own risk.
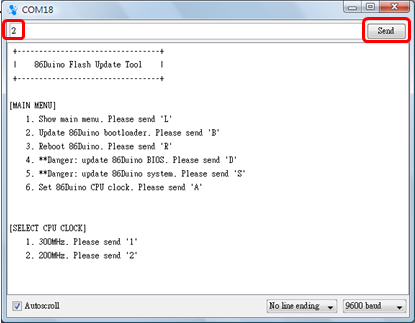
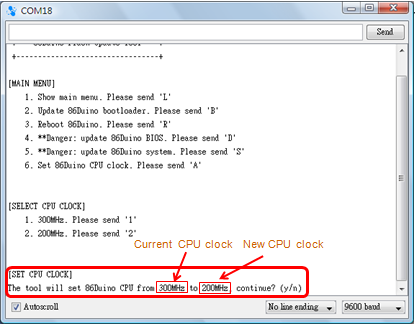
The 200MHz is used for this tutorial. Enter 2 and click the Send button to select this clock.
Serial monitor displays message to indicate the CPU clock to be updated, as shown below.
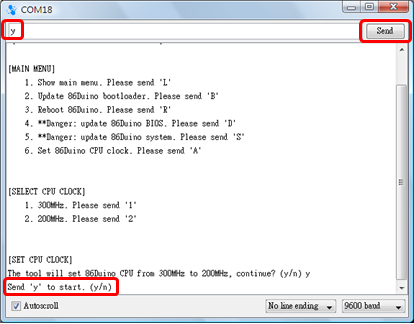
Enter y and click the Send button to continue.

Enter y and click the Send button, one more time, to confirm and continue.
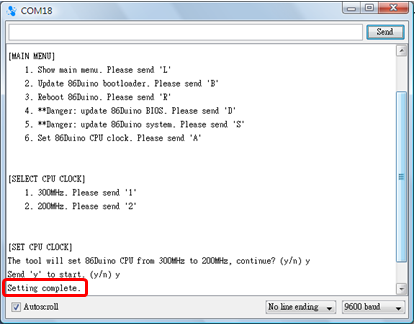
After CPU clock is updated, serial monitor screen indicate the process is complete , as shown below.
Next, close the “Serial Monitor” window.
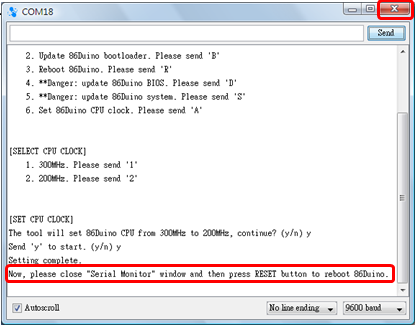
Then press RESET button on 86Duino.
After 86Duino reboot, the new clock setting will be applied。
The text of the 86Duino reference is licensed under a Creative Commons Attribution-ShareAlike 3.0 License.